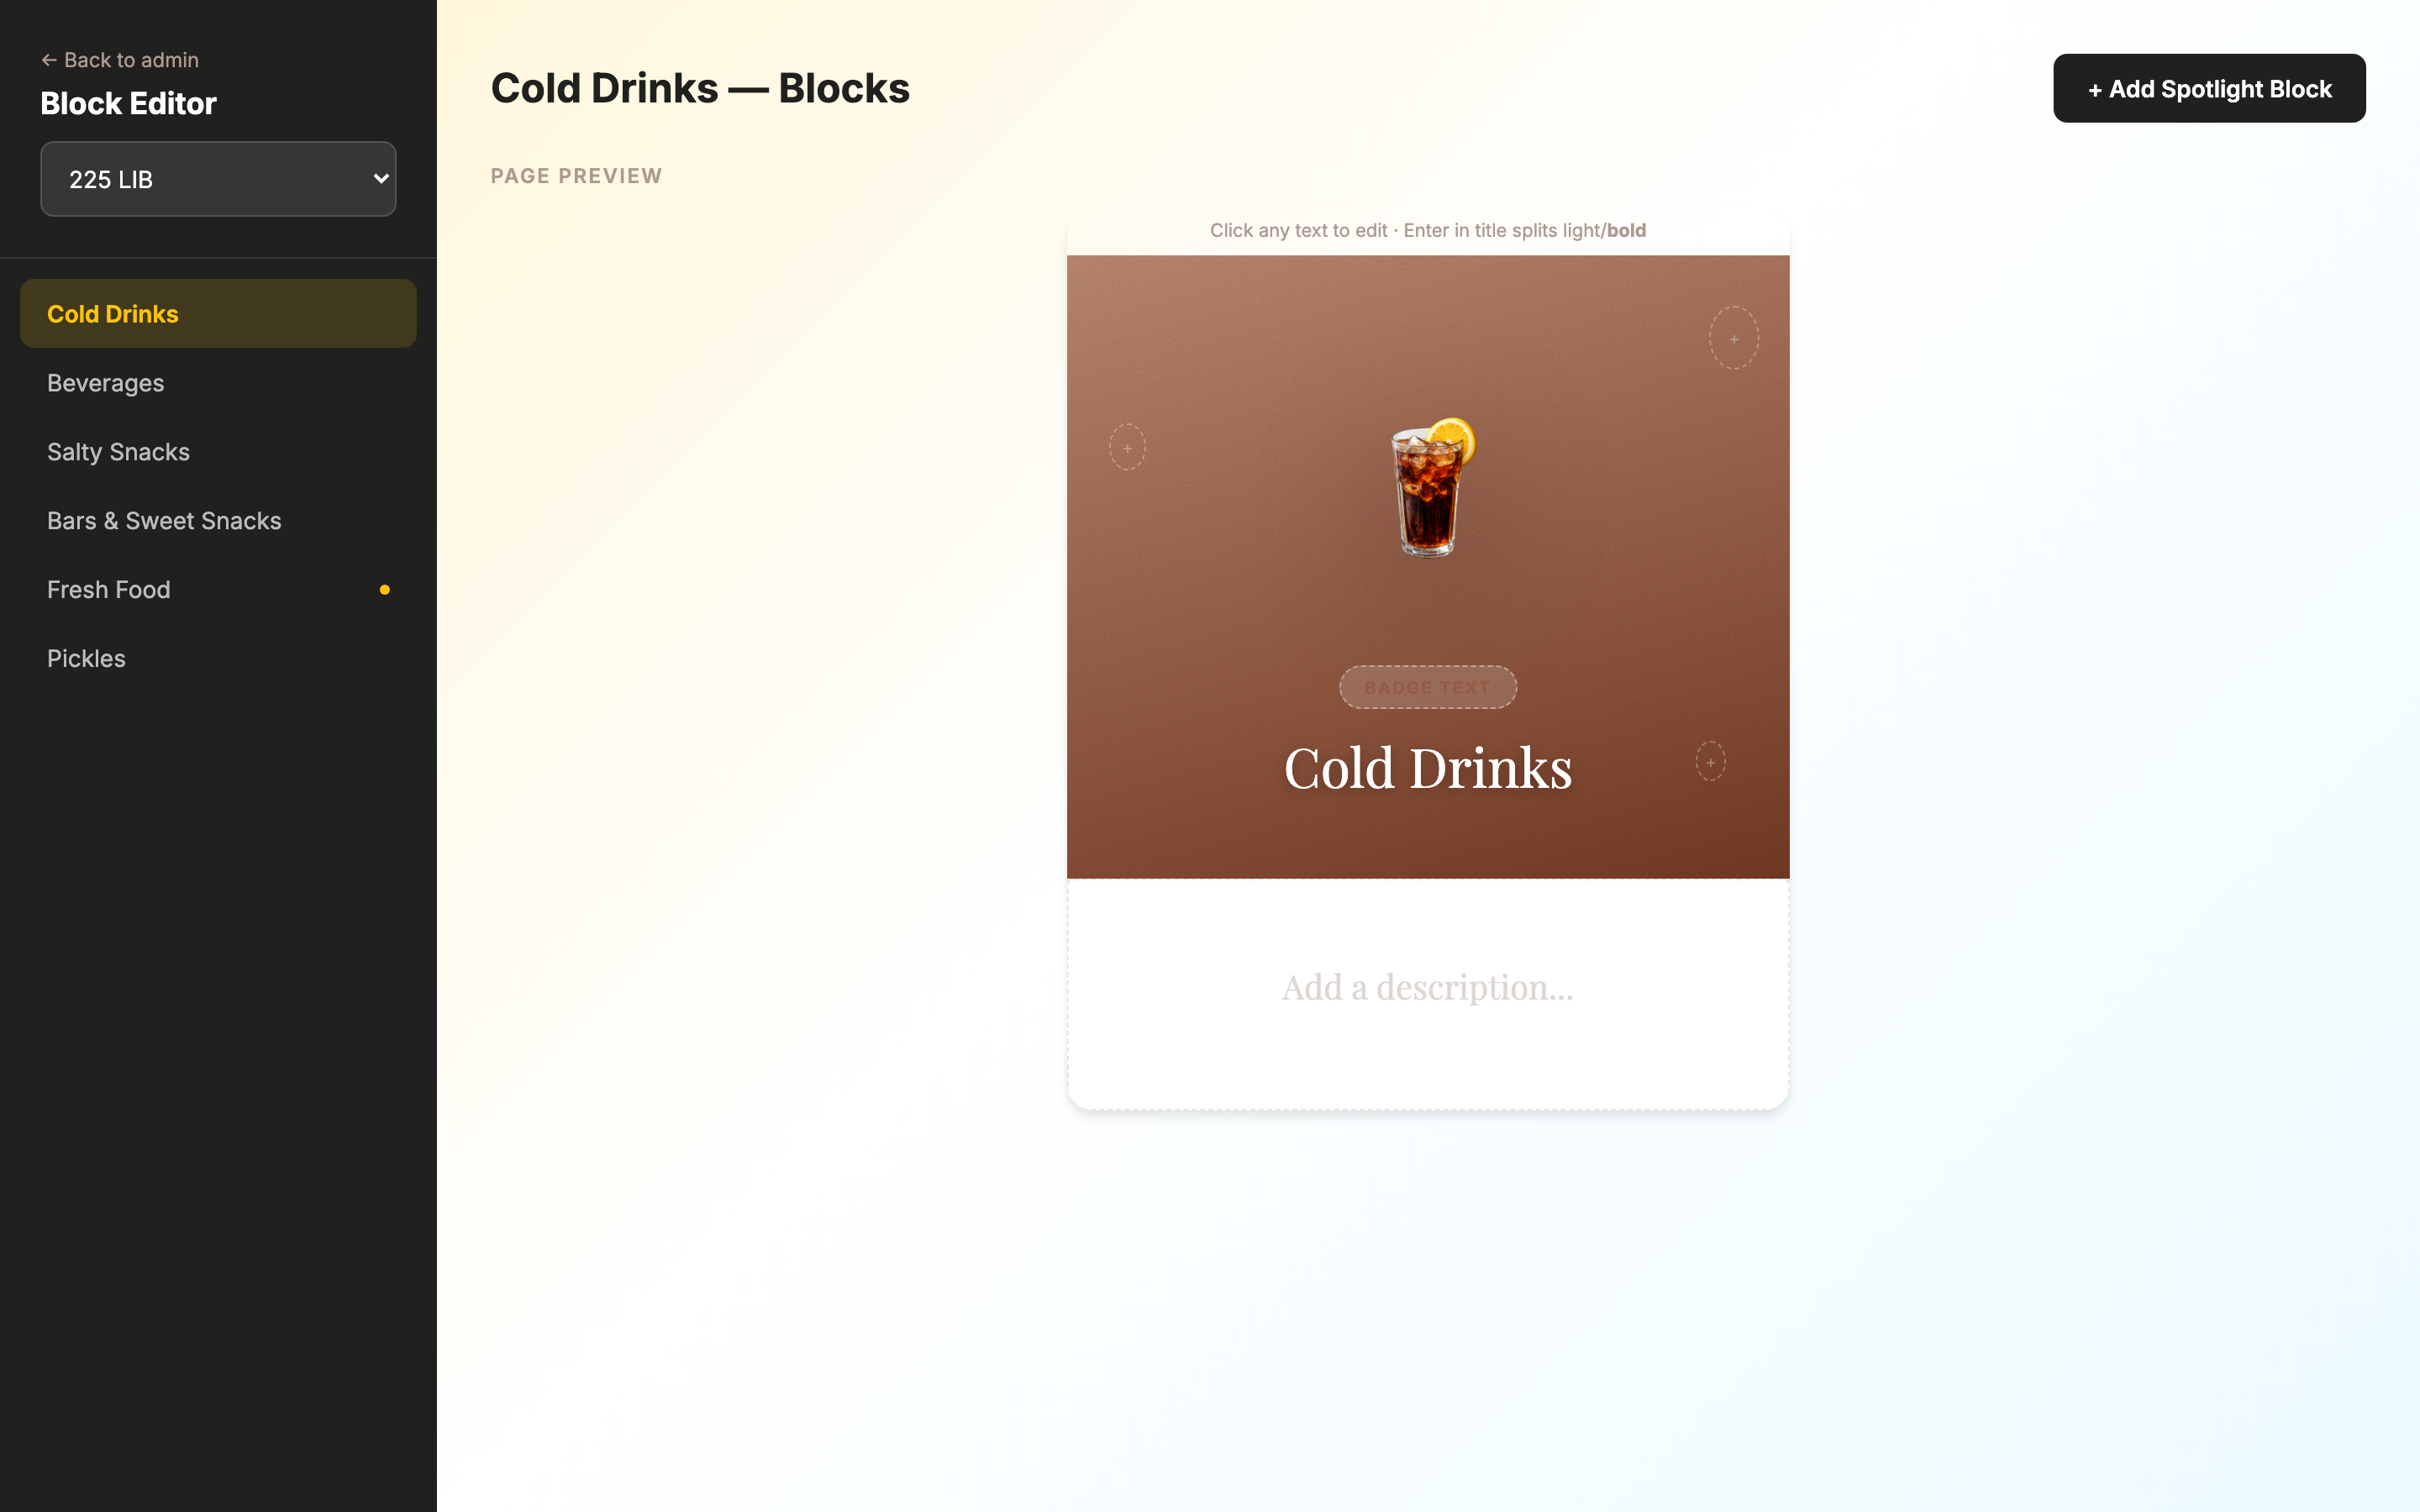
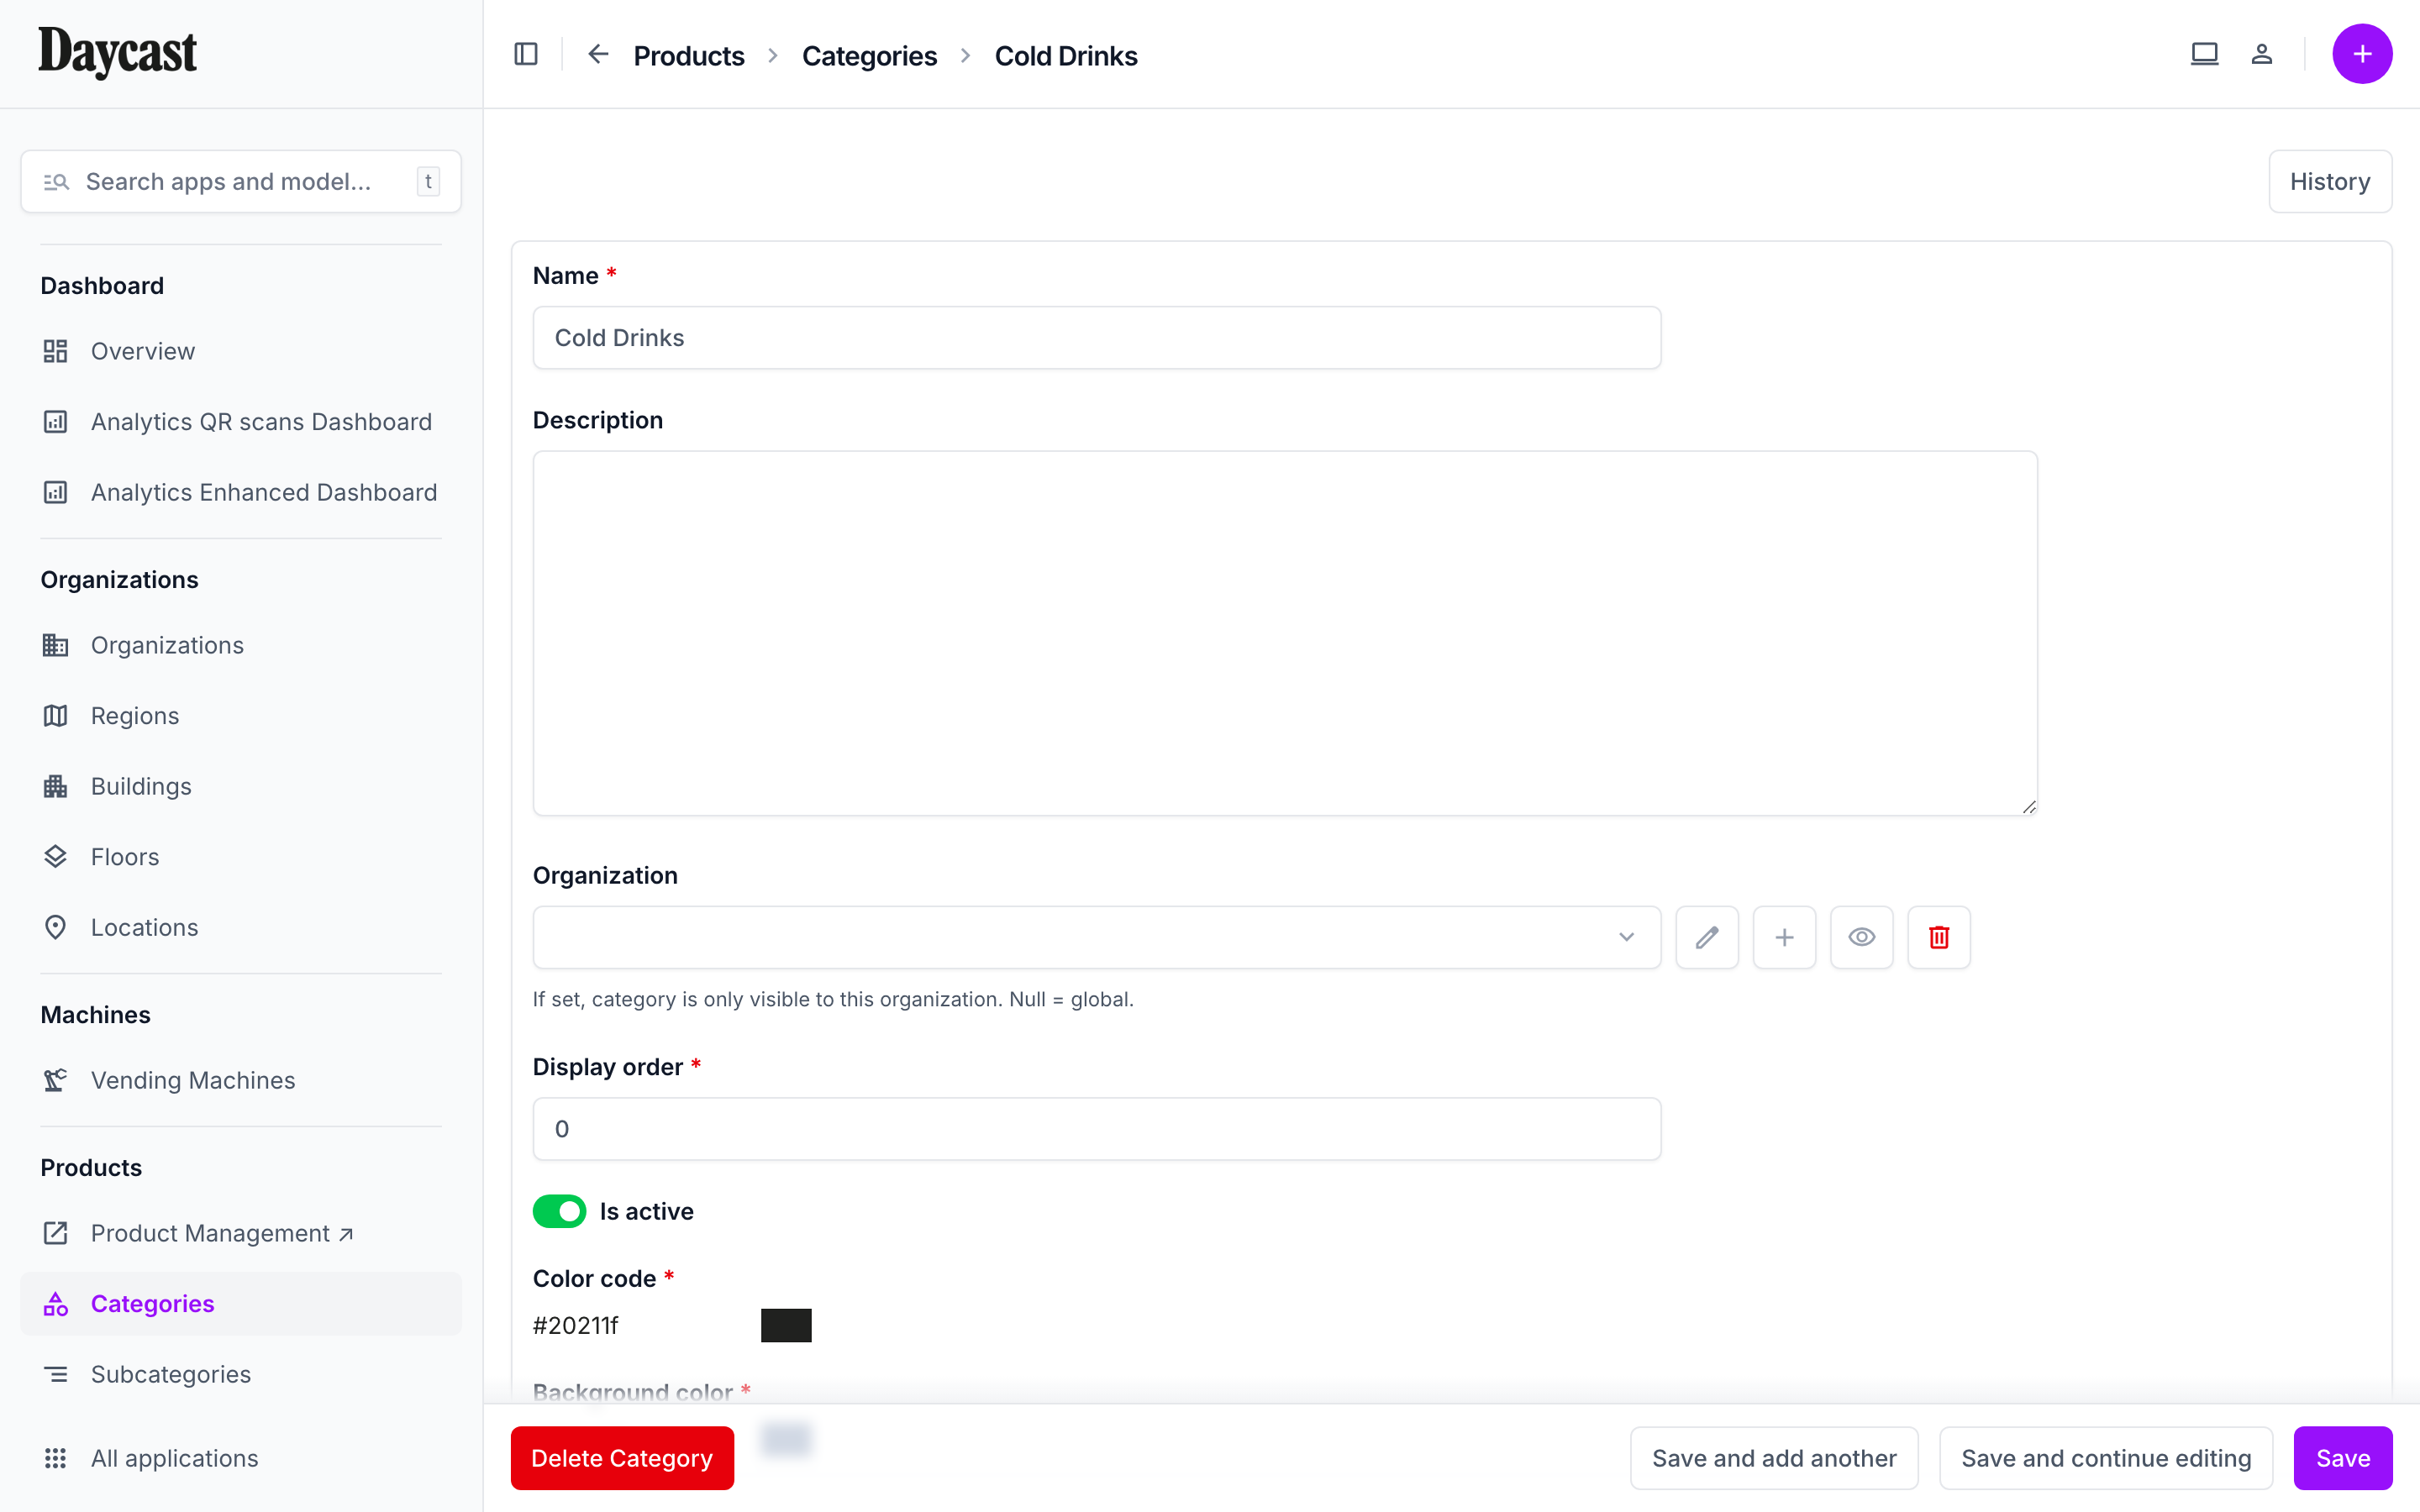
This is a custom panel (not the default Django admin). It has its own sidebar, navigation, and a visual interface designed for day-to-day product operations.
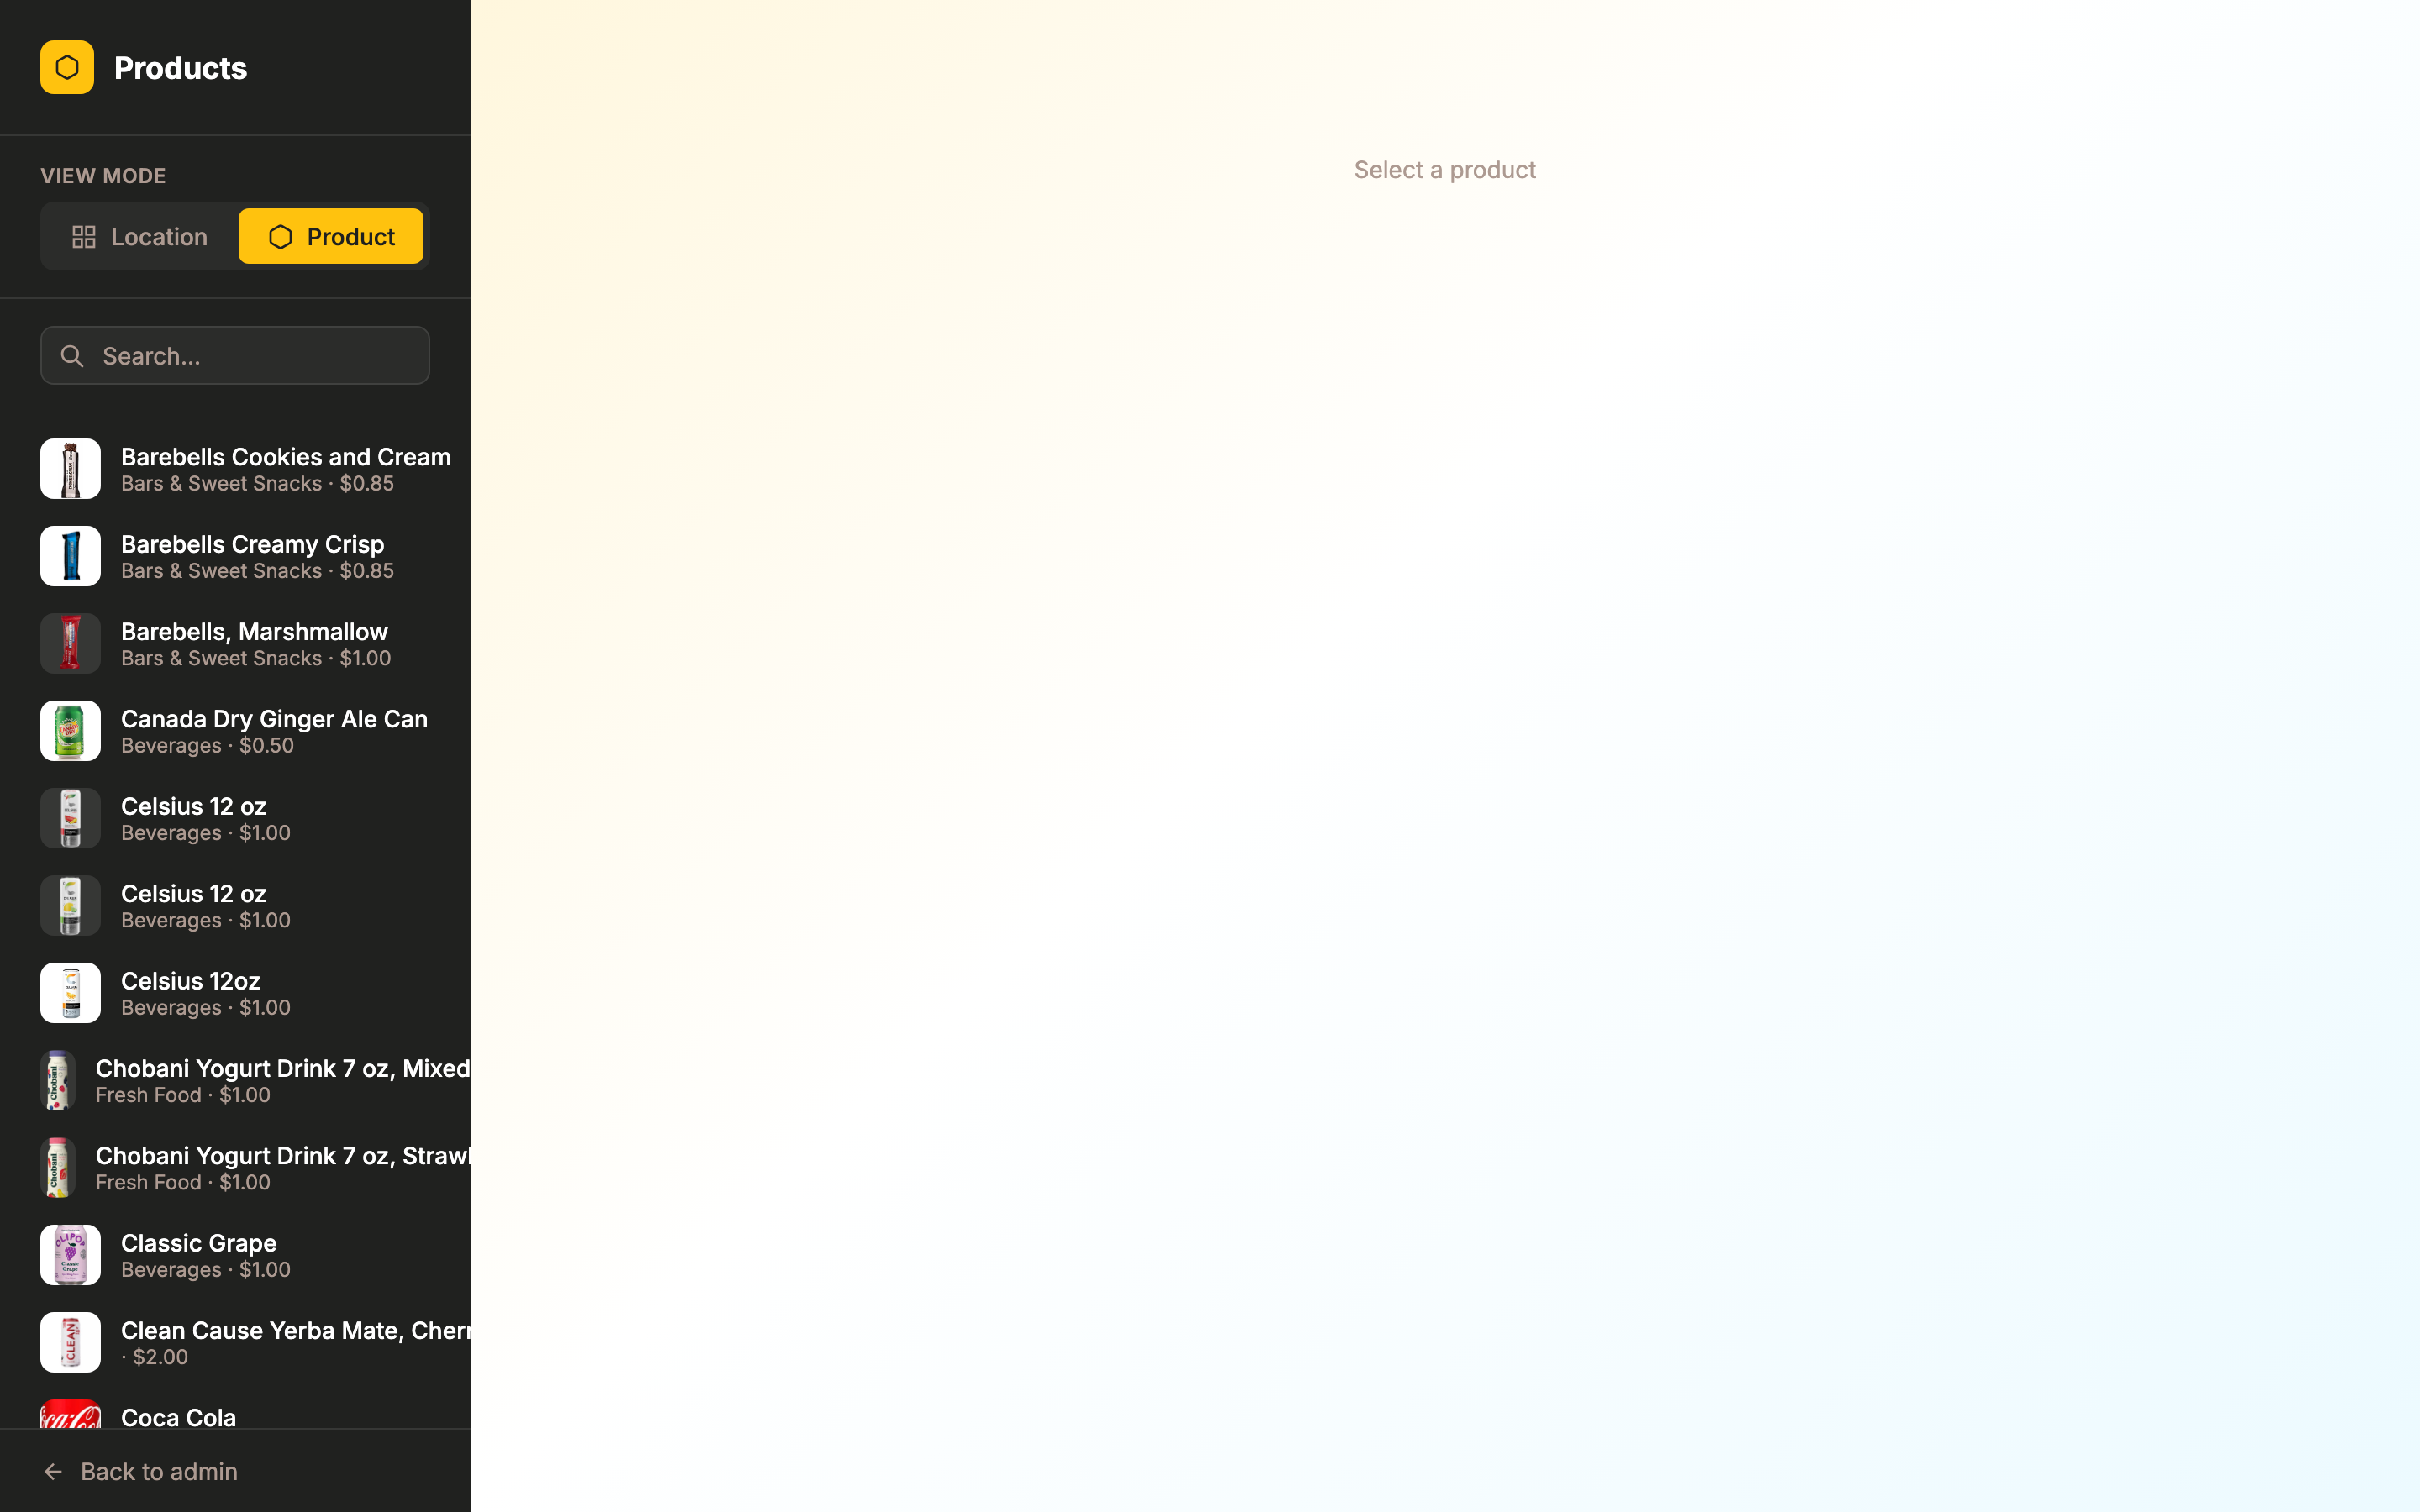
📷 Main view — Sidebar with organization tree, Location/Product view toggle, and search
Getting Around
| Action | How | Type |
|---|---|---|
| Switch between Location & Product view | Use the toggle buttons at the top of the sidebar | Click |
| Navigate Org → Location → Machine | Click the arrow to expand each level in the sidebar tree | Click |
| Search sidebar | Type in the search box at the top of the sidebar | Type |
| Resize sidebar | Drag the right edge of the sidebar | Drag |
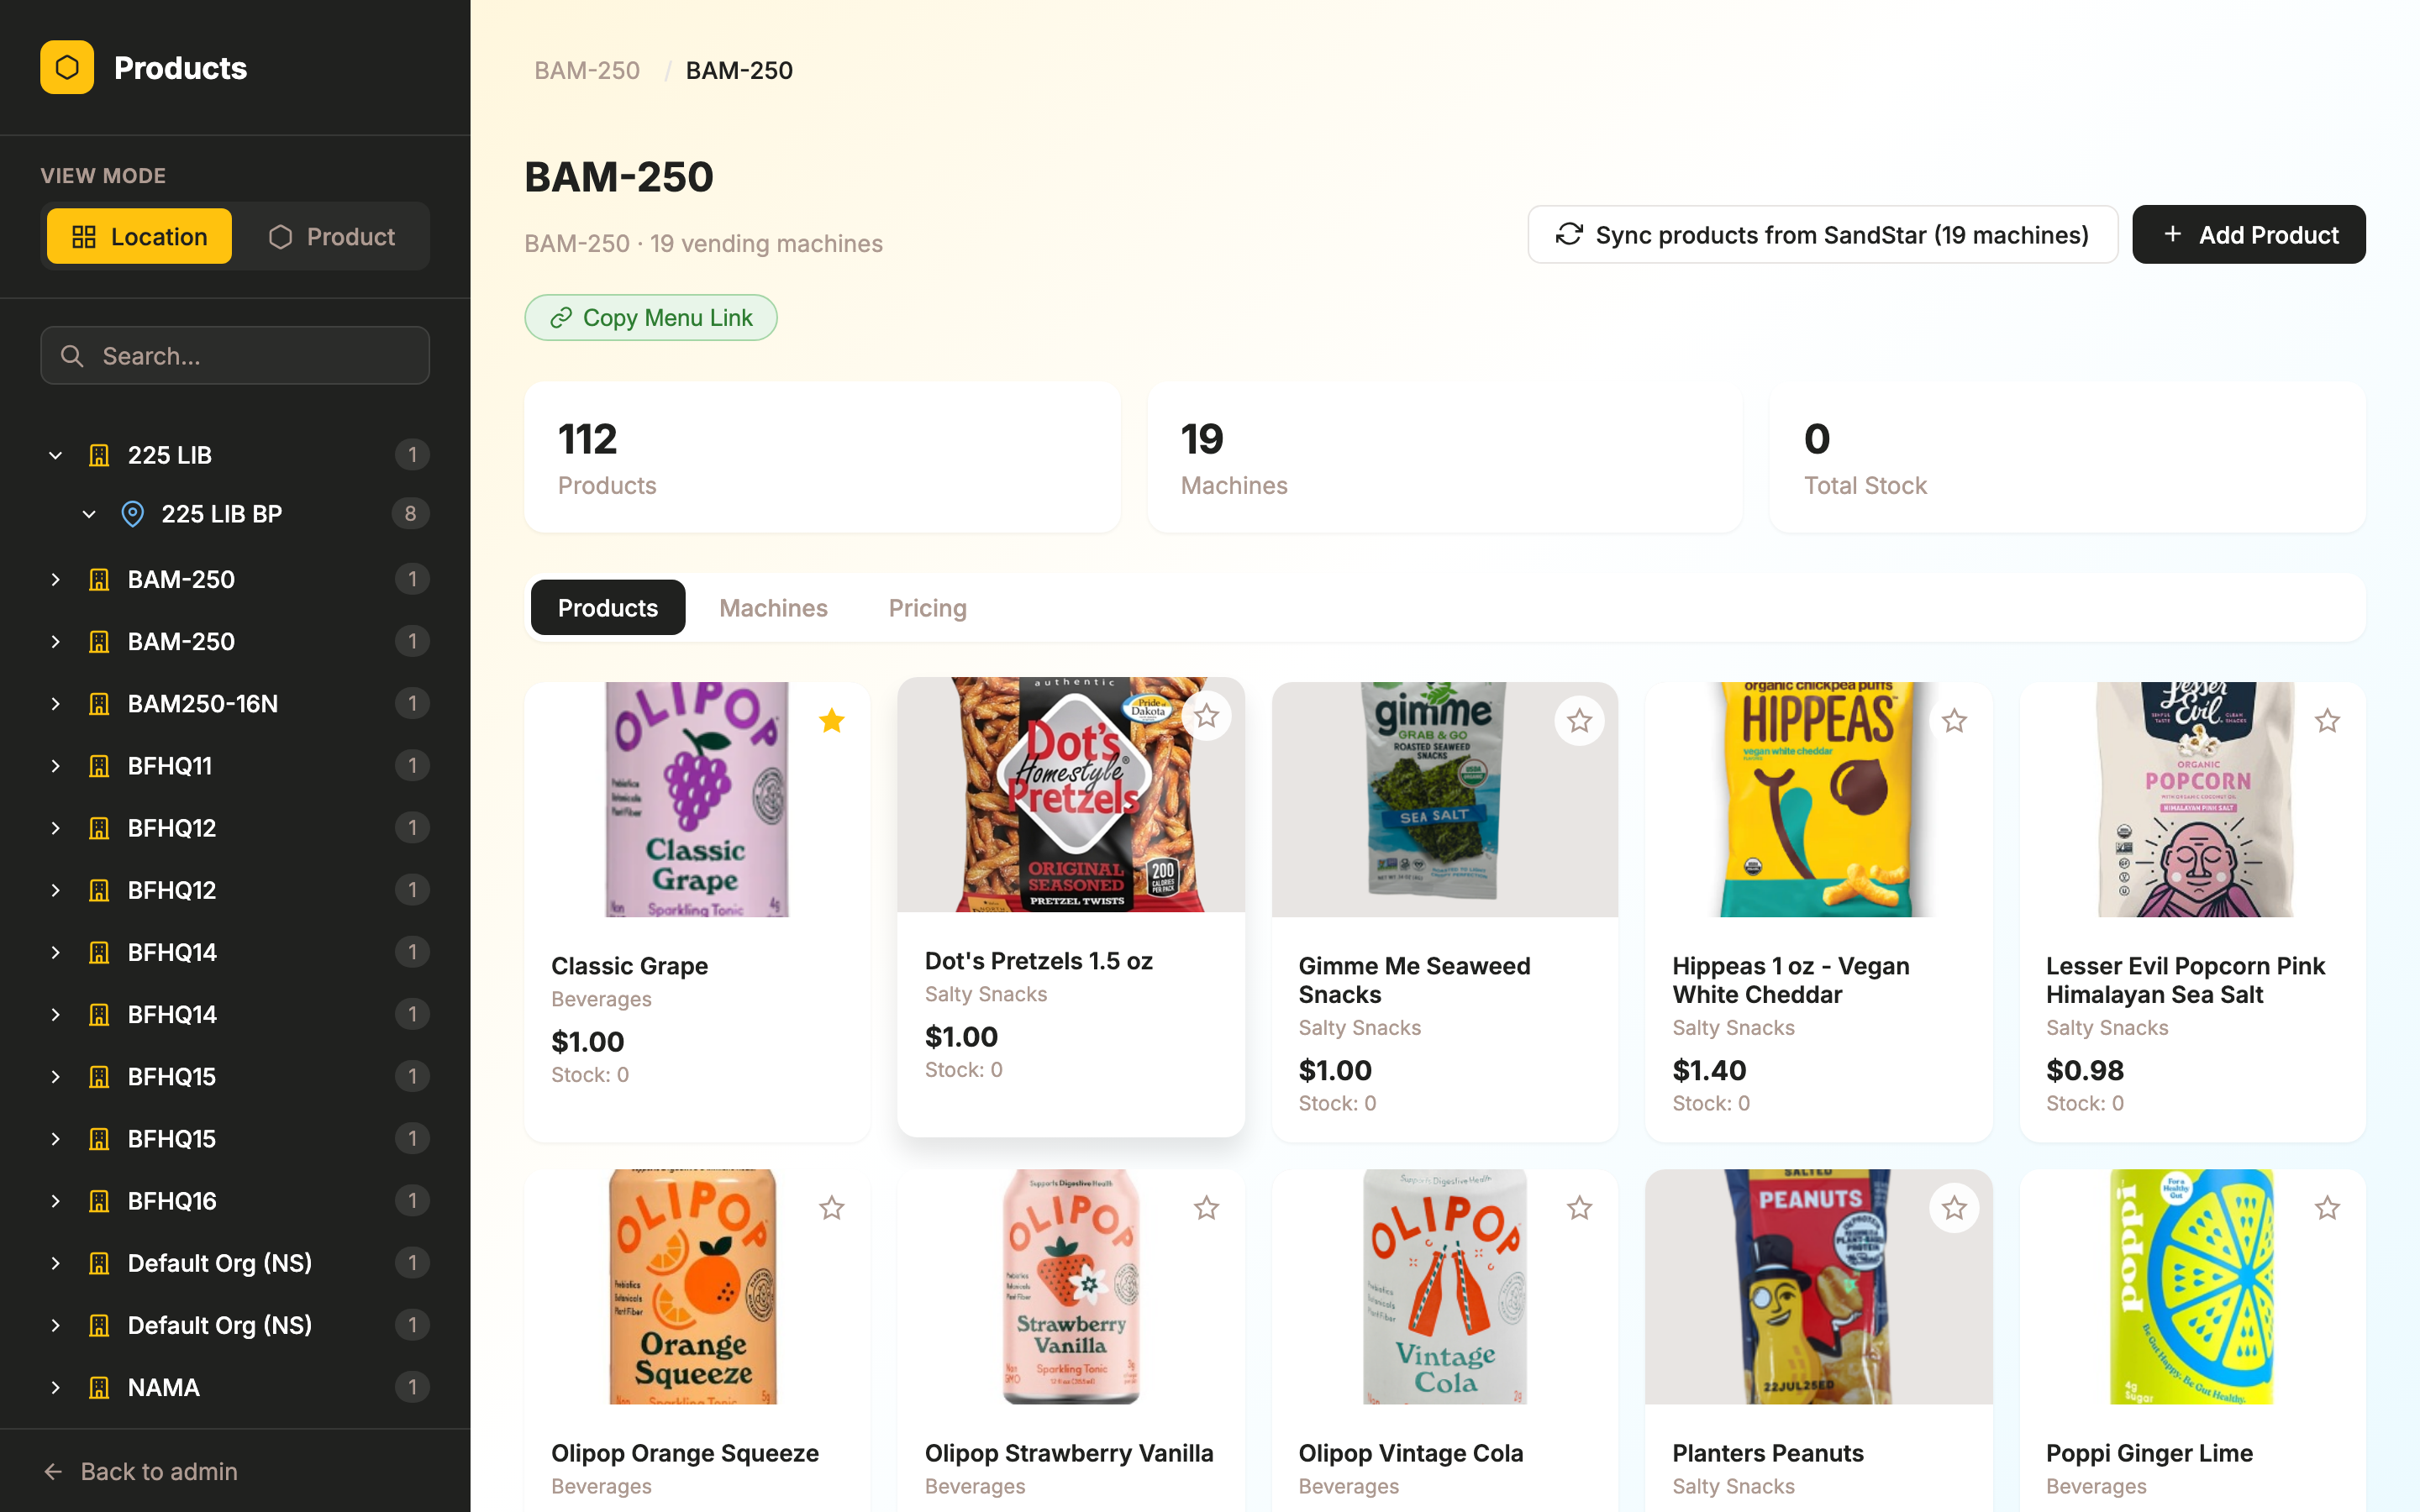
📷 Location selected — Product grid with images, prices, stock, featured stars, and tabs (Products / Machines / Pricing)
Products Tab (Location View)
| Action | How | Type |
|---|---|---|
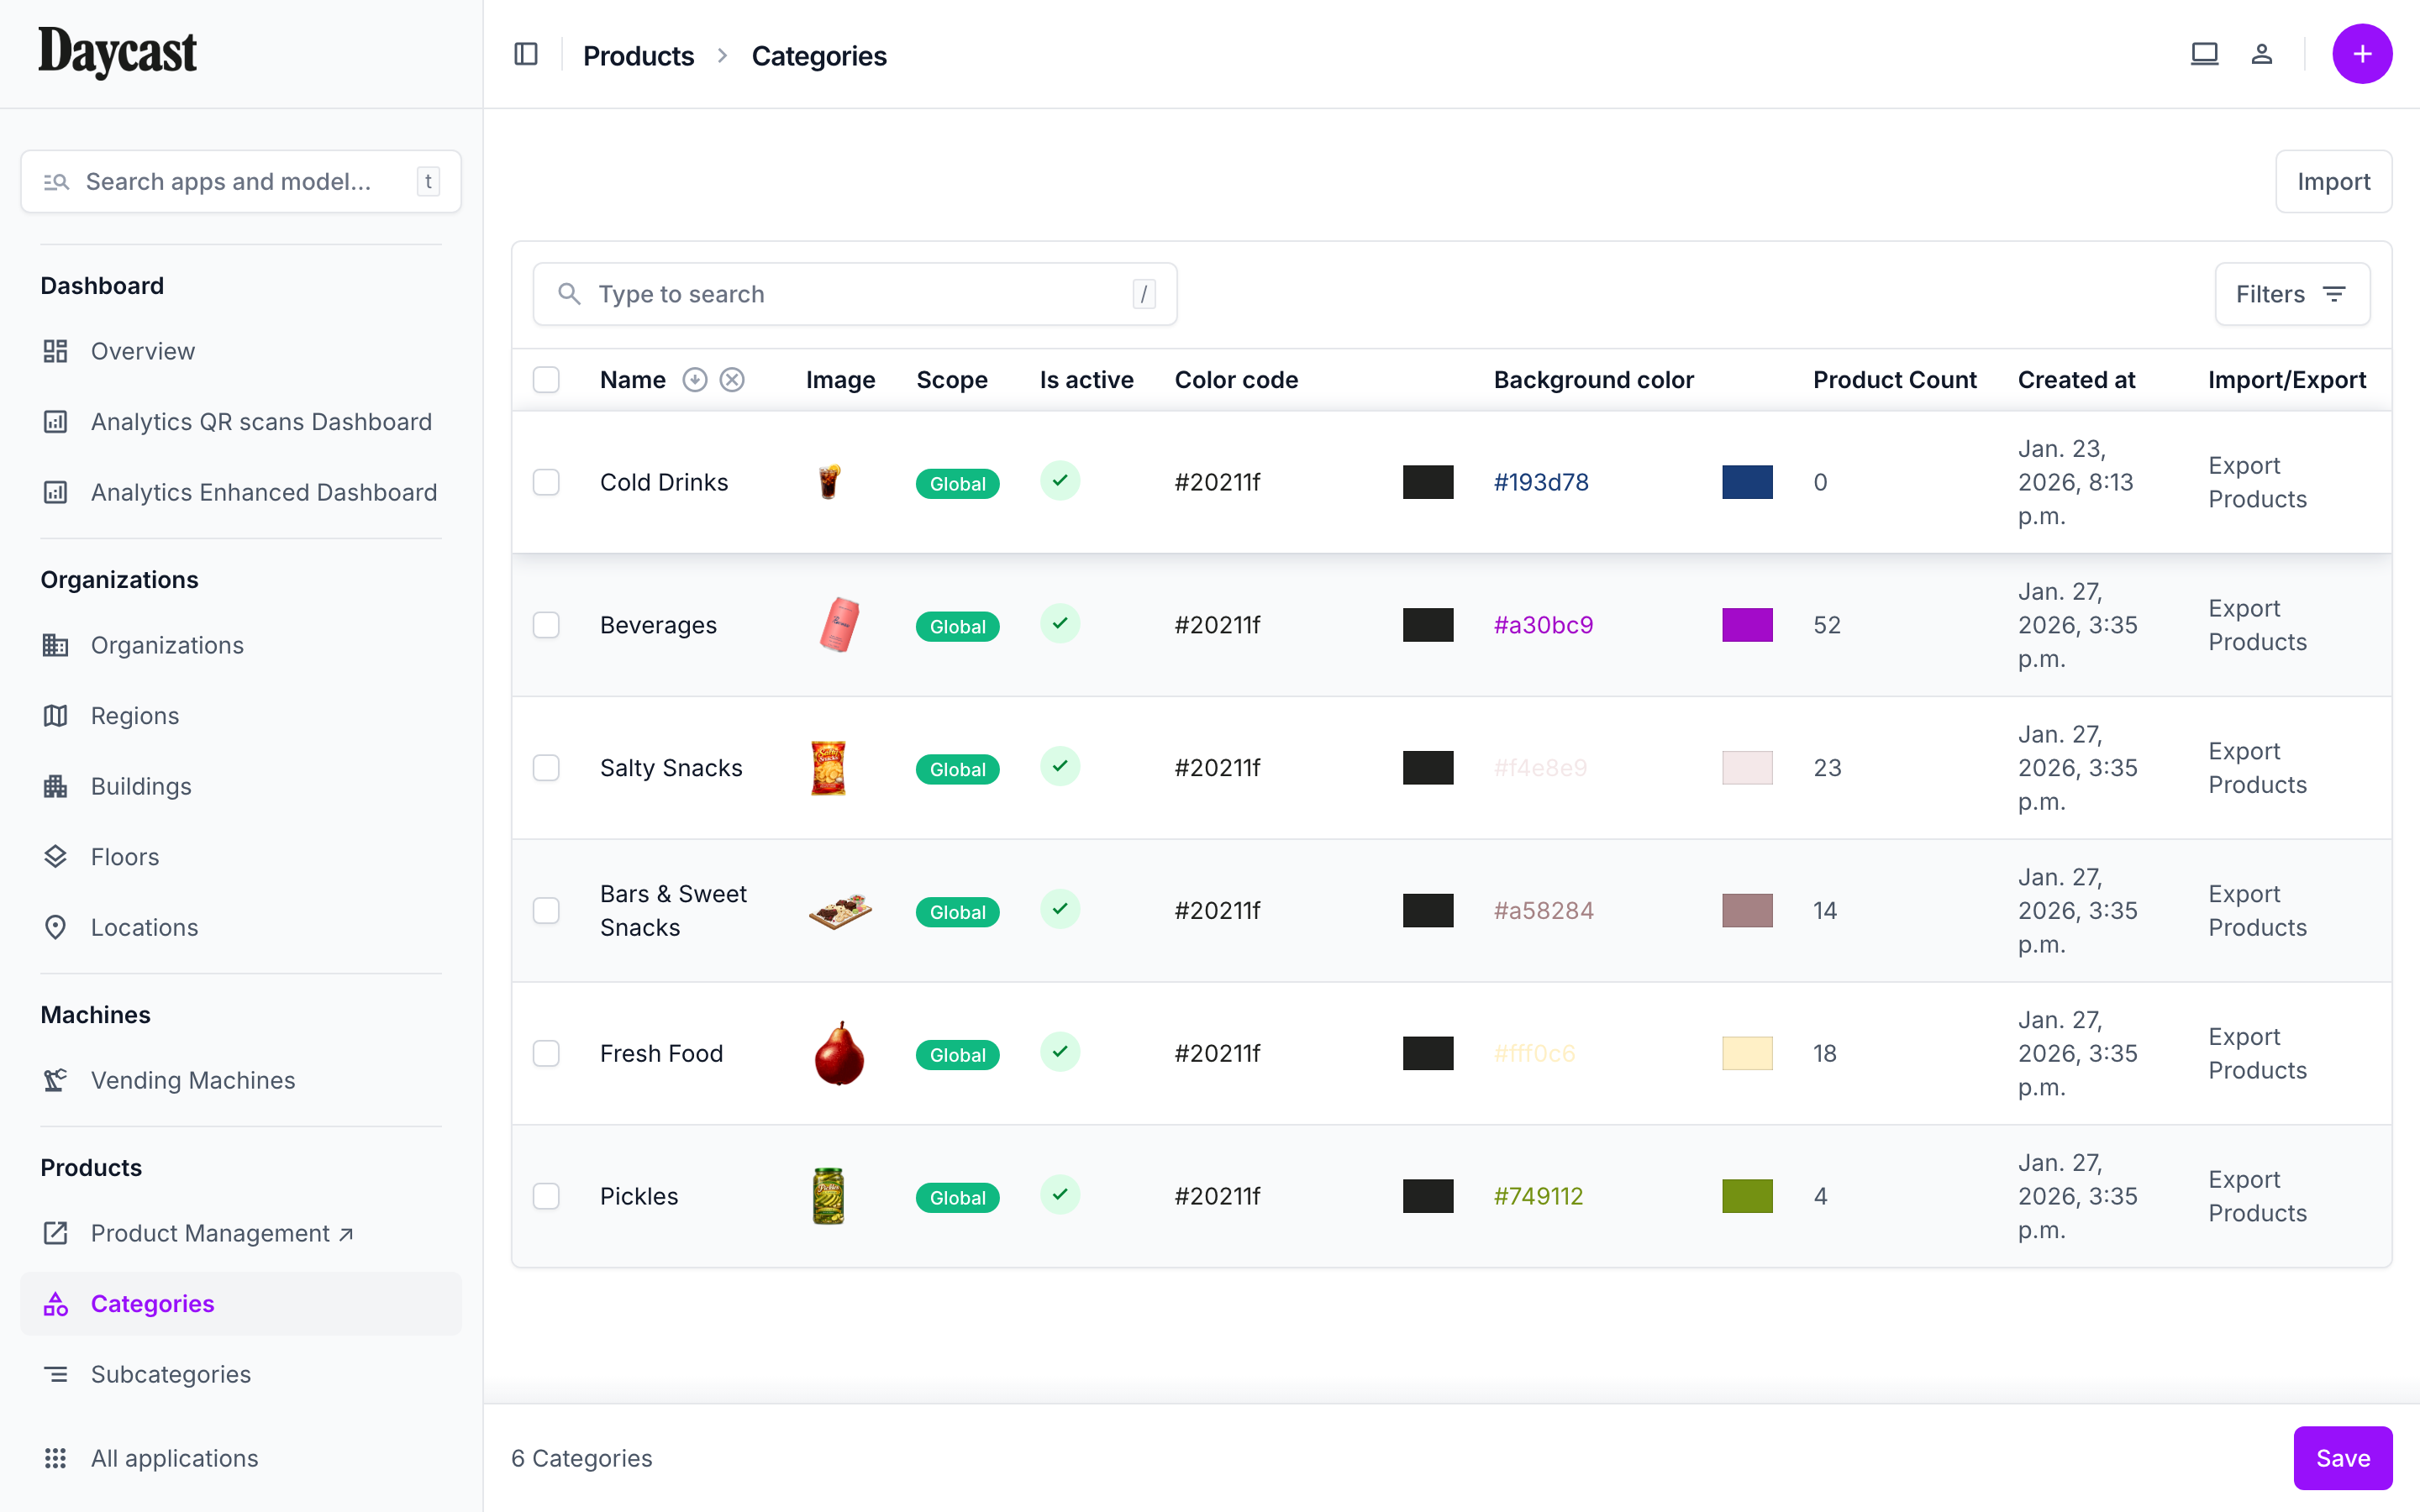
| Browse products | Select a location → Products tab shows a visual grid of all products in the menu | Click |
| Search products | Use the search bar above the product grid | Type |
| Toggle featured product | Click the star icon on the top-right of any product card | Toggle |
| Add product to menu | Click "+ Add Product" → search and select from the product catalog → set price, stock, availability | Form |
| Remove product from menu | Click the trash icon next to the product in the table view | Click |
| View product details | Click on a product card to see full details, locations where it appears, and pricing | Click |
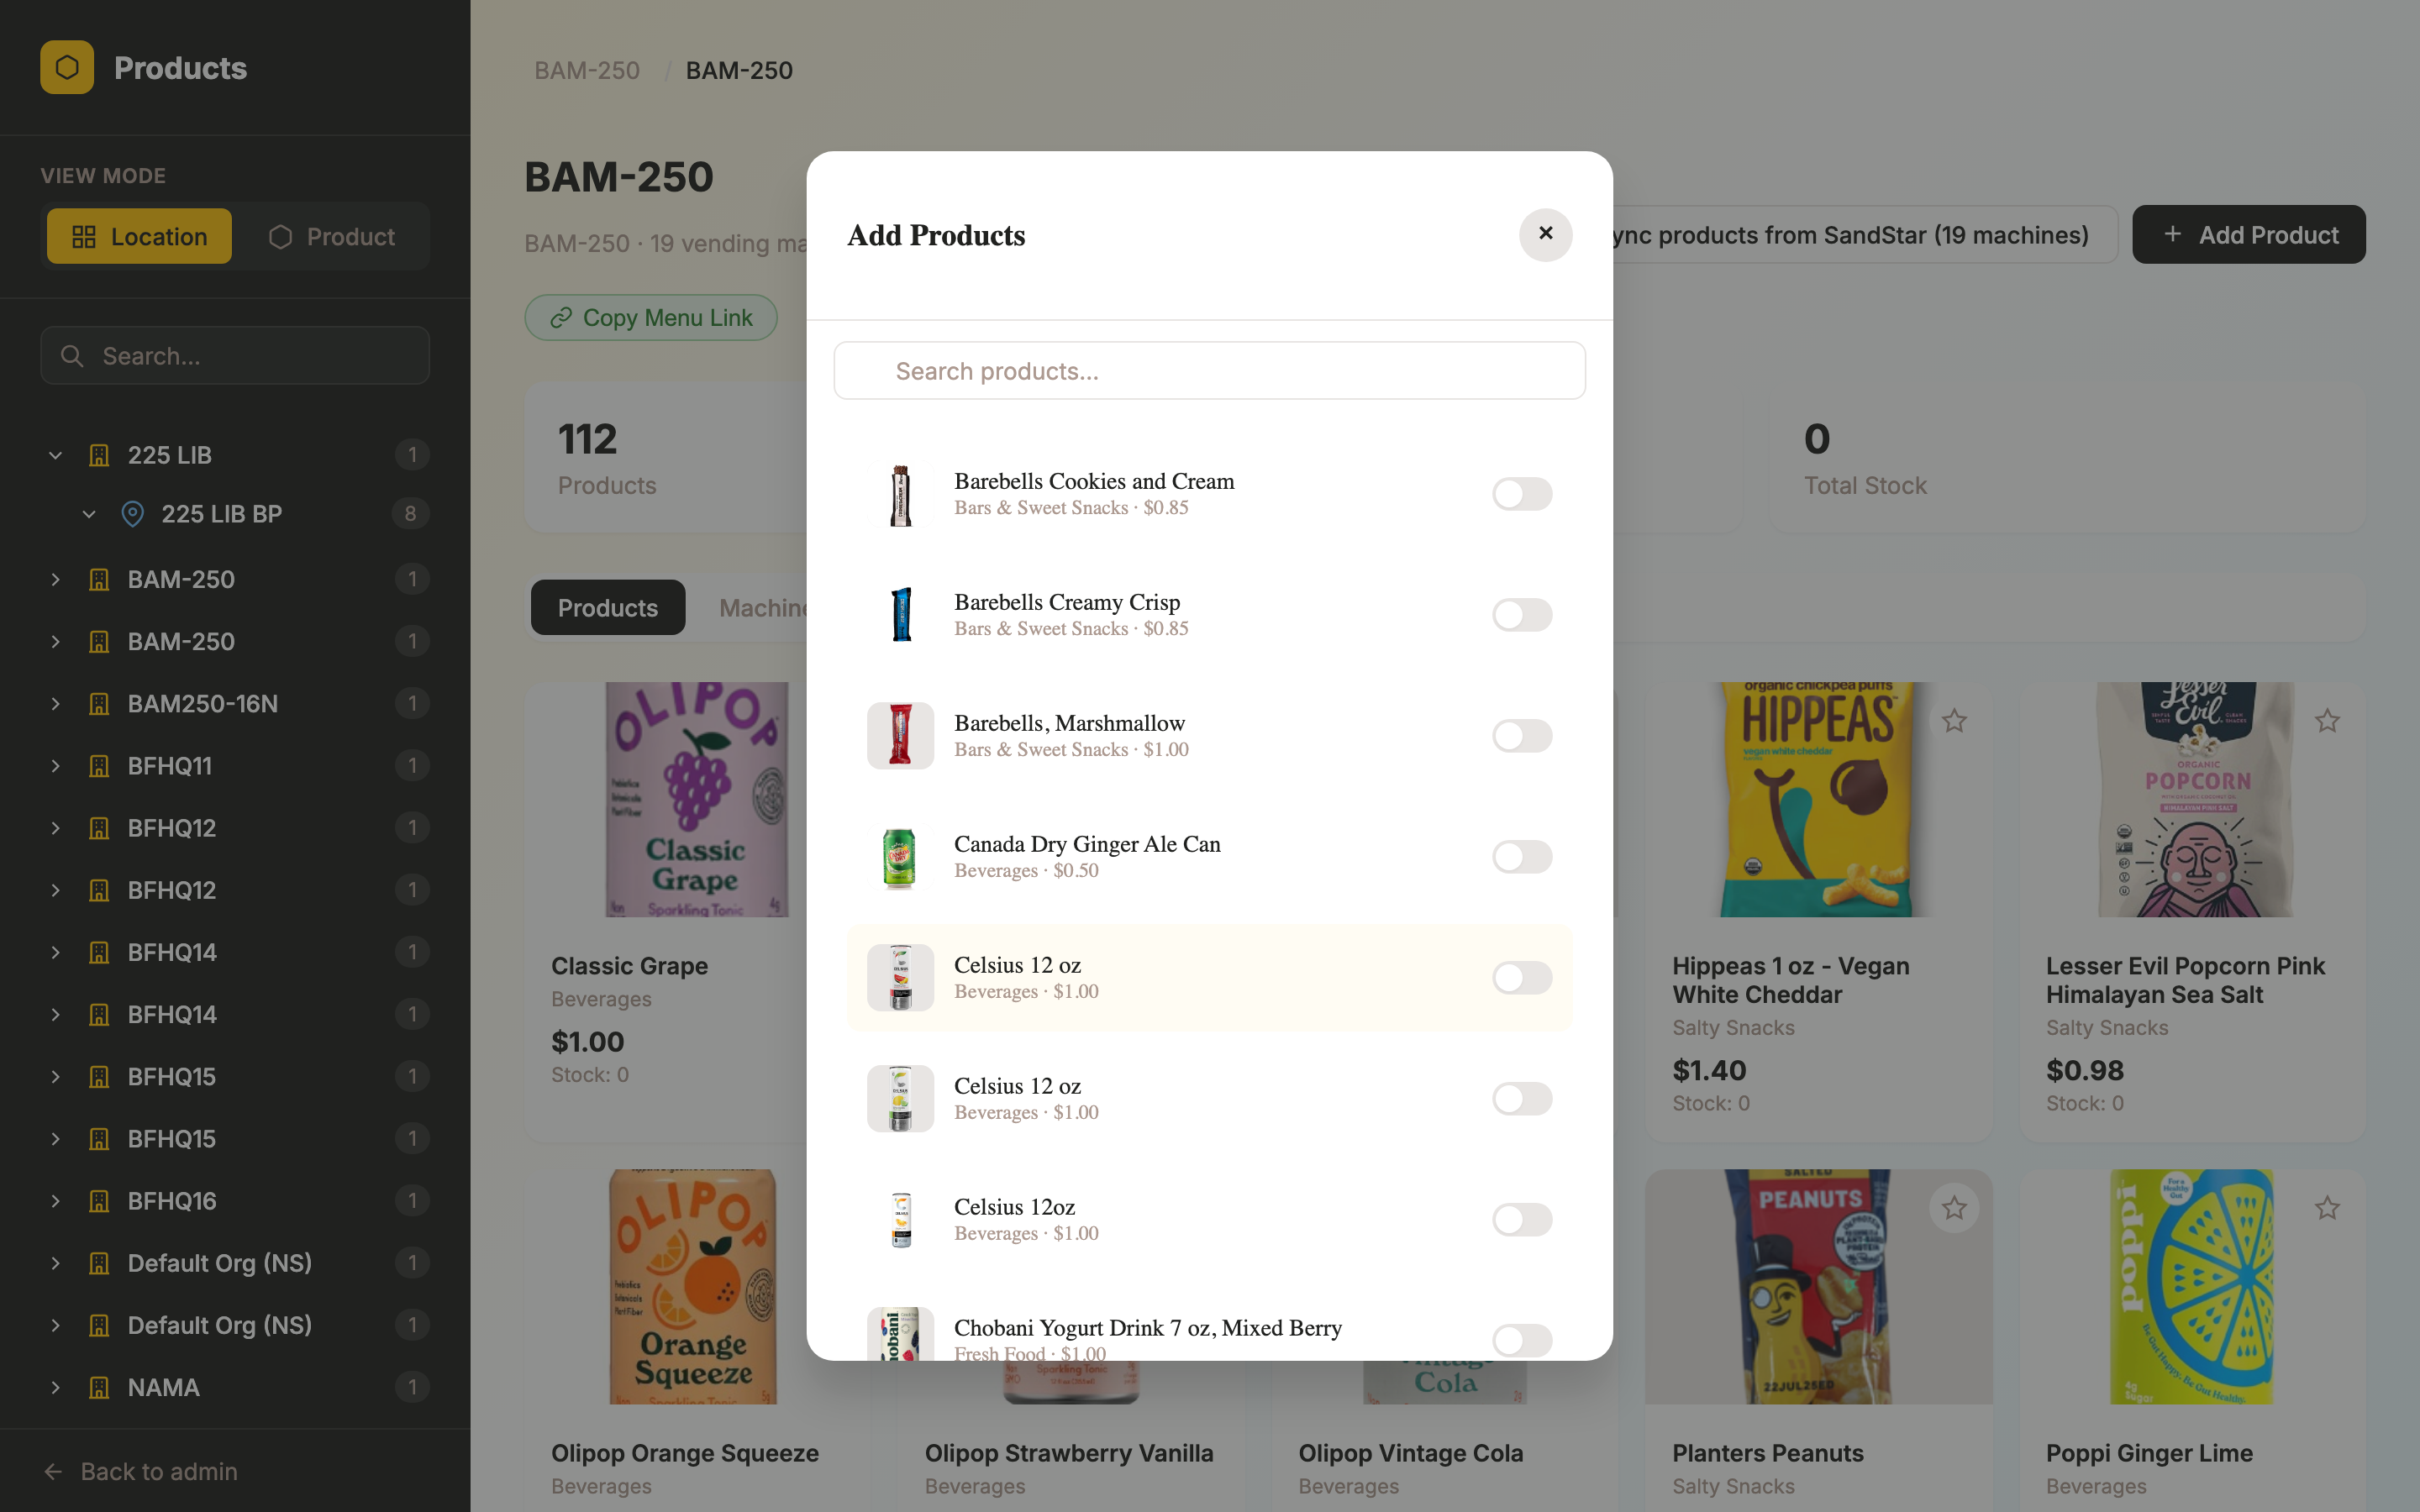
📷 Add Products modal — Search and toggle products to add them to the location's menu
Machines Tab (Location View)
| Action | How | Type |
|---|---|---|
| View machines at a location | Select a location → Machines tab shows cards for each vending machine | Click |
| See machine status | Each card shows a green/orange/red badge with the current status | — |
| Click into a machine | Click any machine card to see its menu items and product list | Click |
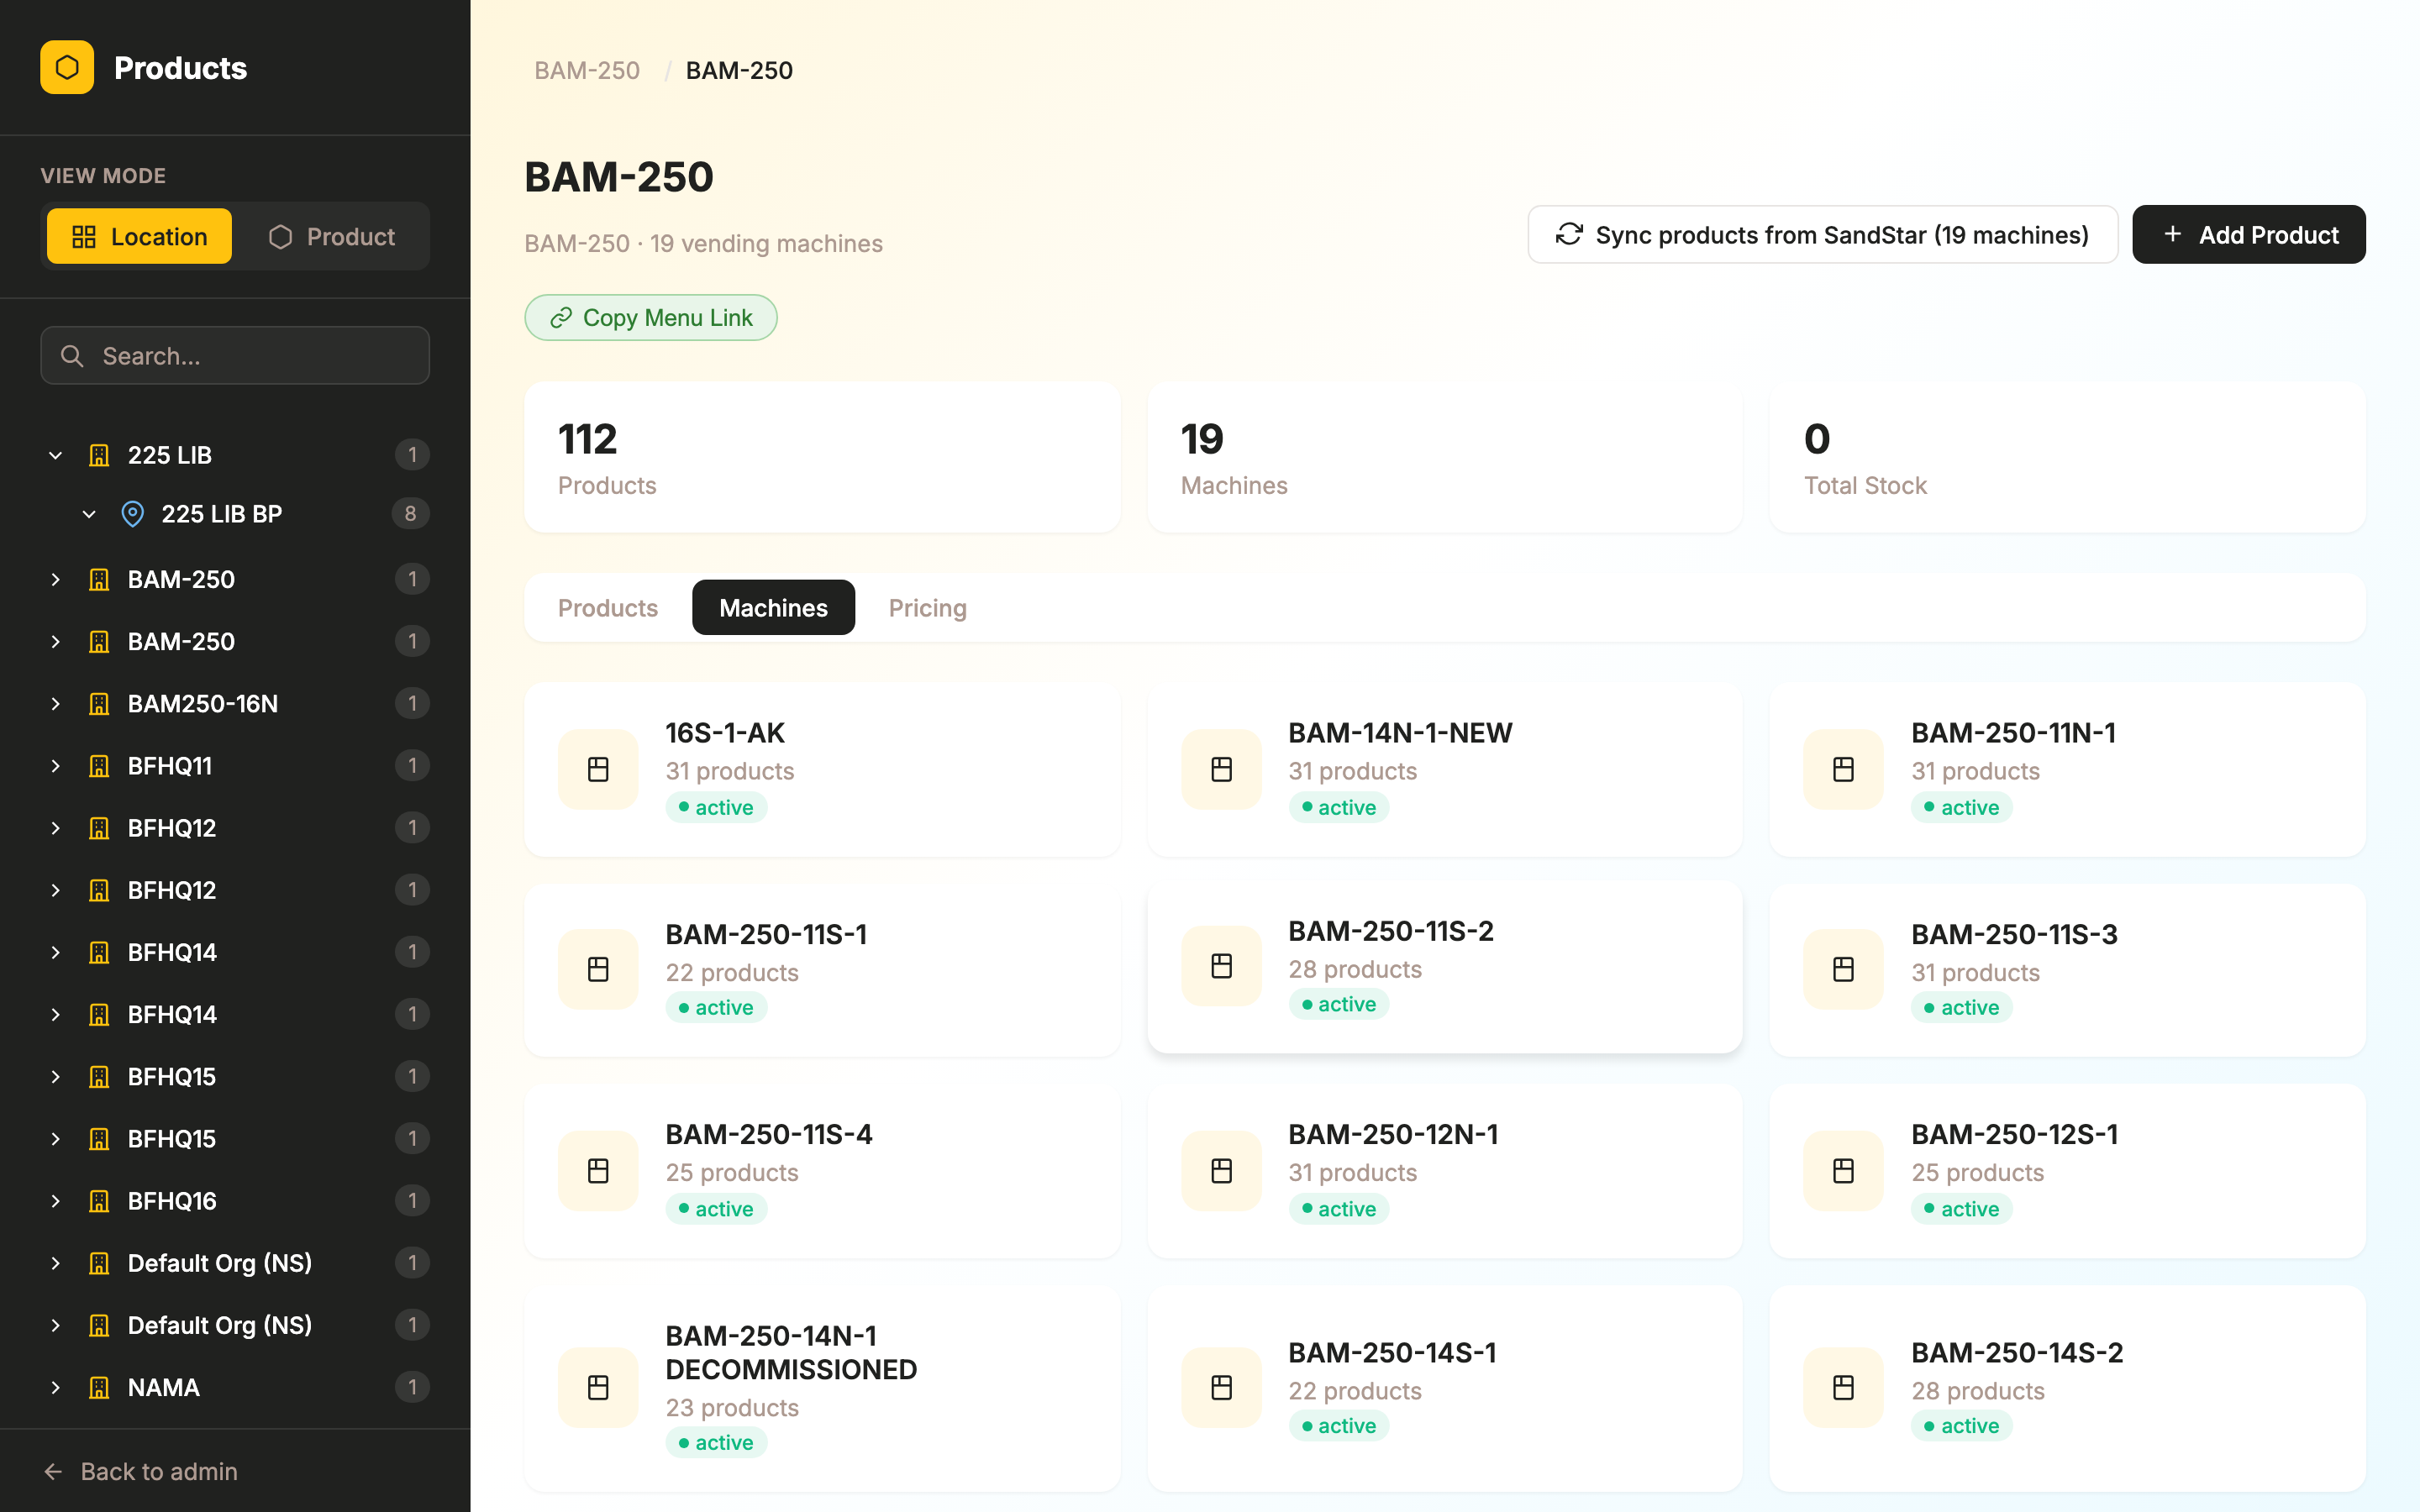
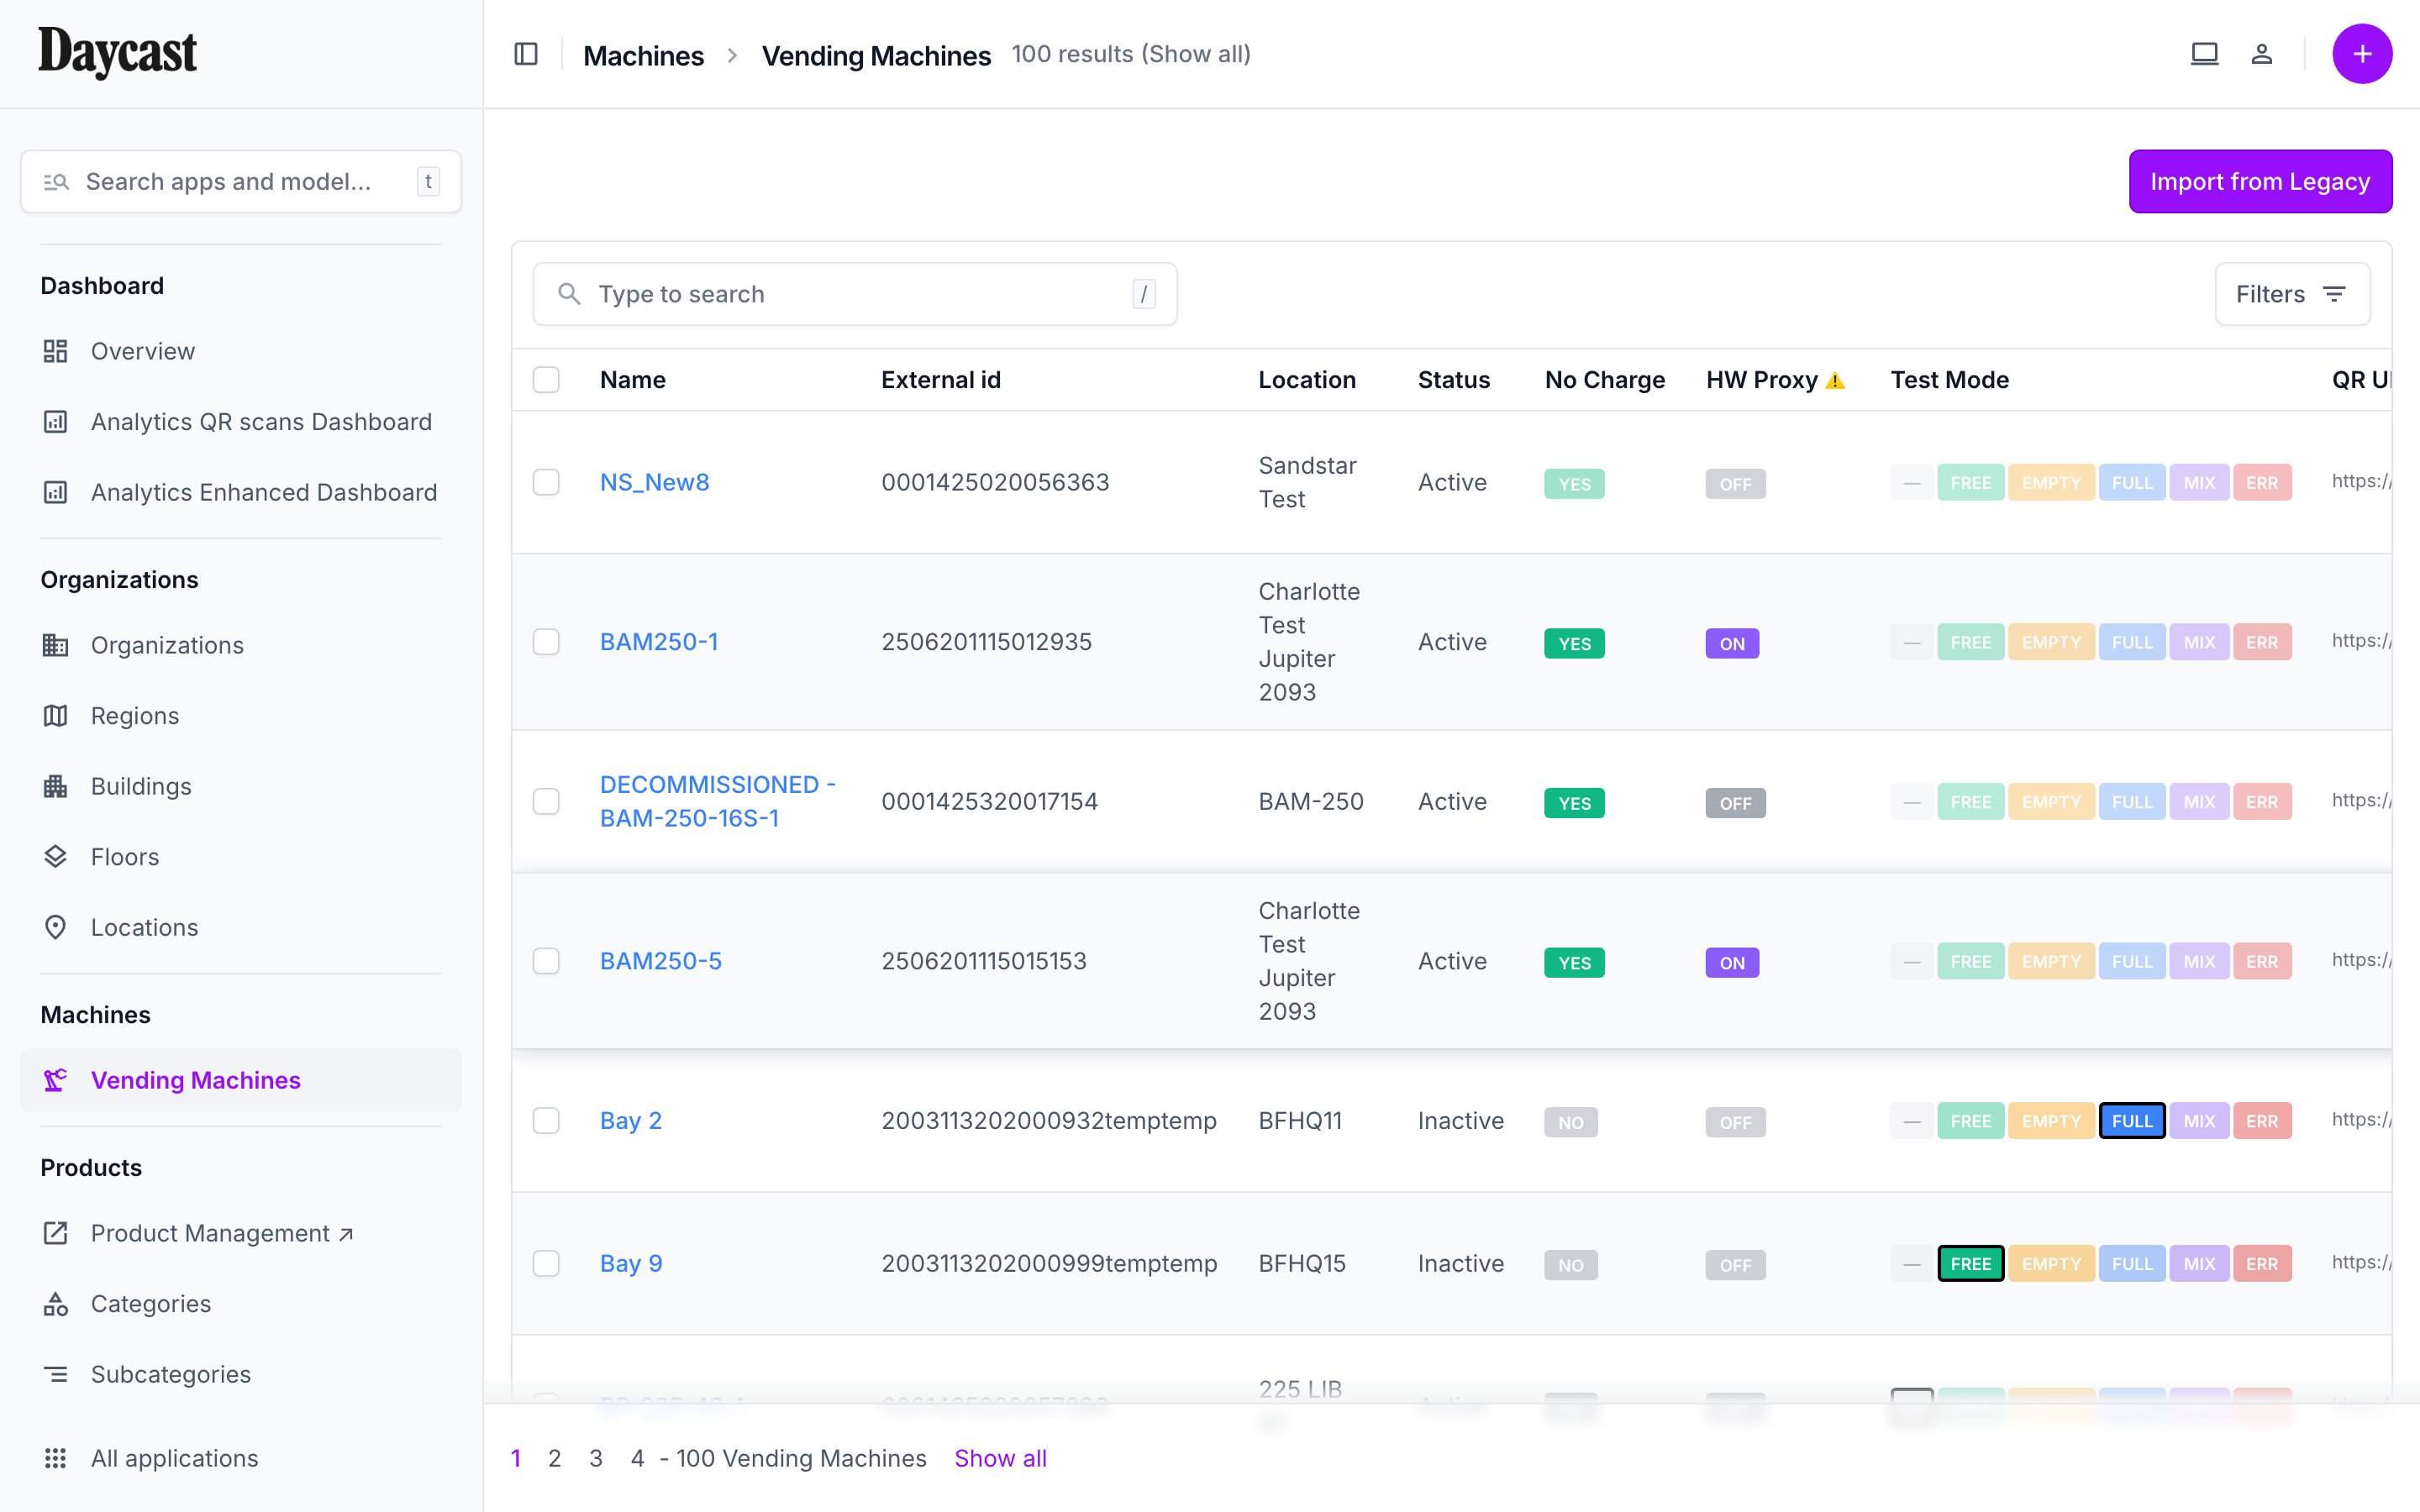
📷 Machines tab — Grid of vending machines at the selected location with status badges and product count
Pricing Tab (Location View)
| Action | How | Type |
|---|---|---|
| View cross-machine pricing | Select a location → Pricing tab shows a table of products vs. machines | Click |
| Edit price per machine | Click any price cell in the table → type the new price → press Enter or Tab | Inline |
| Edit stock per machine | Click the stock number in the table → type the new value | Inline |
| Bulk set price | Click a product row → "Set Price" button → choose machines → enter price → Apply | Bulk |
| Toggle availability | Click the toggle switch in the availability column | Toggle |
| Change menu item category | Use the category dropdown in the table row to reassign | Select |
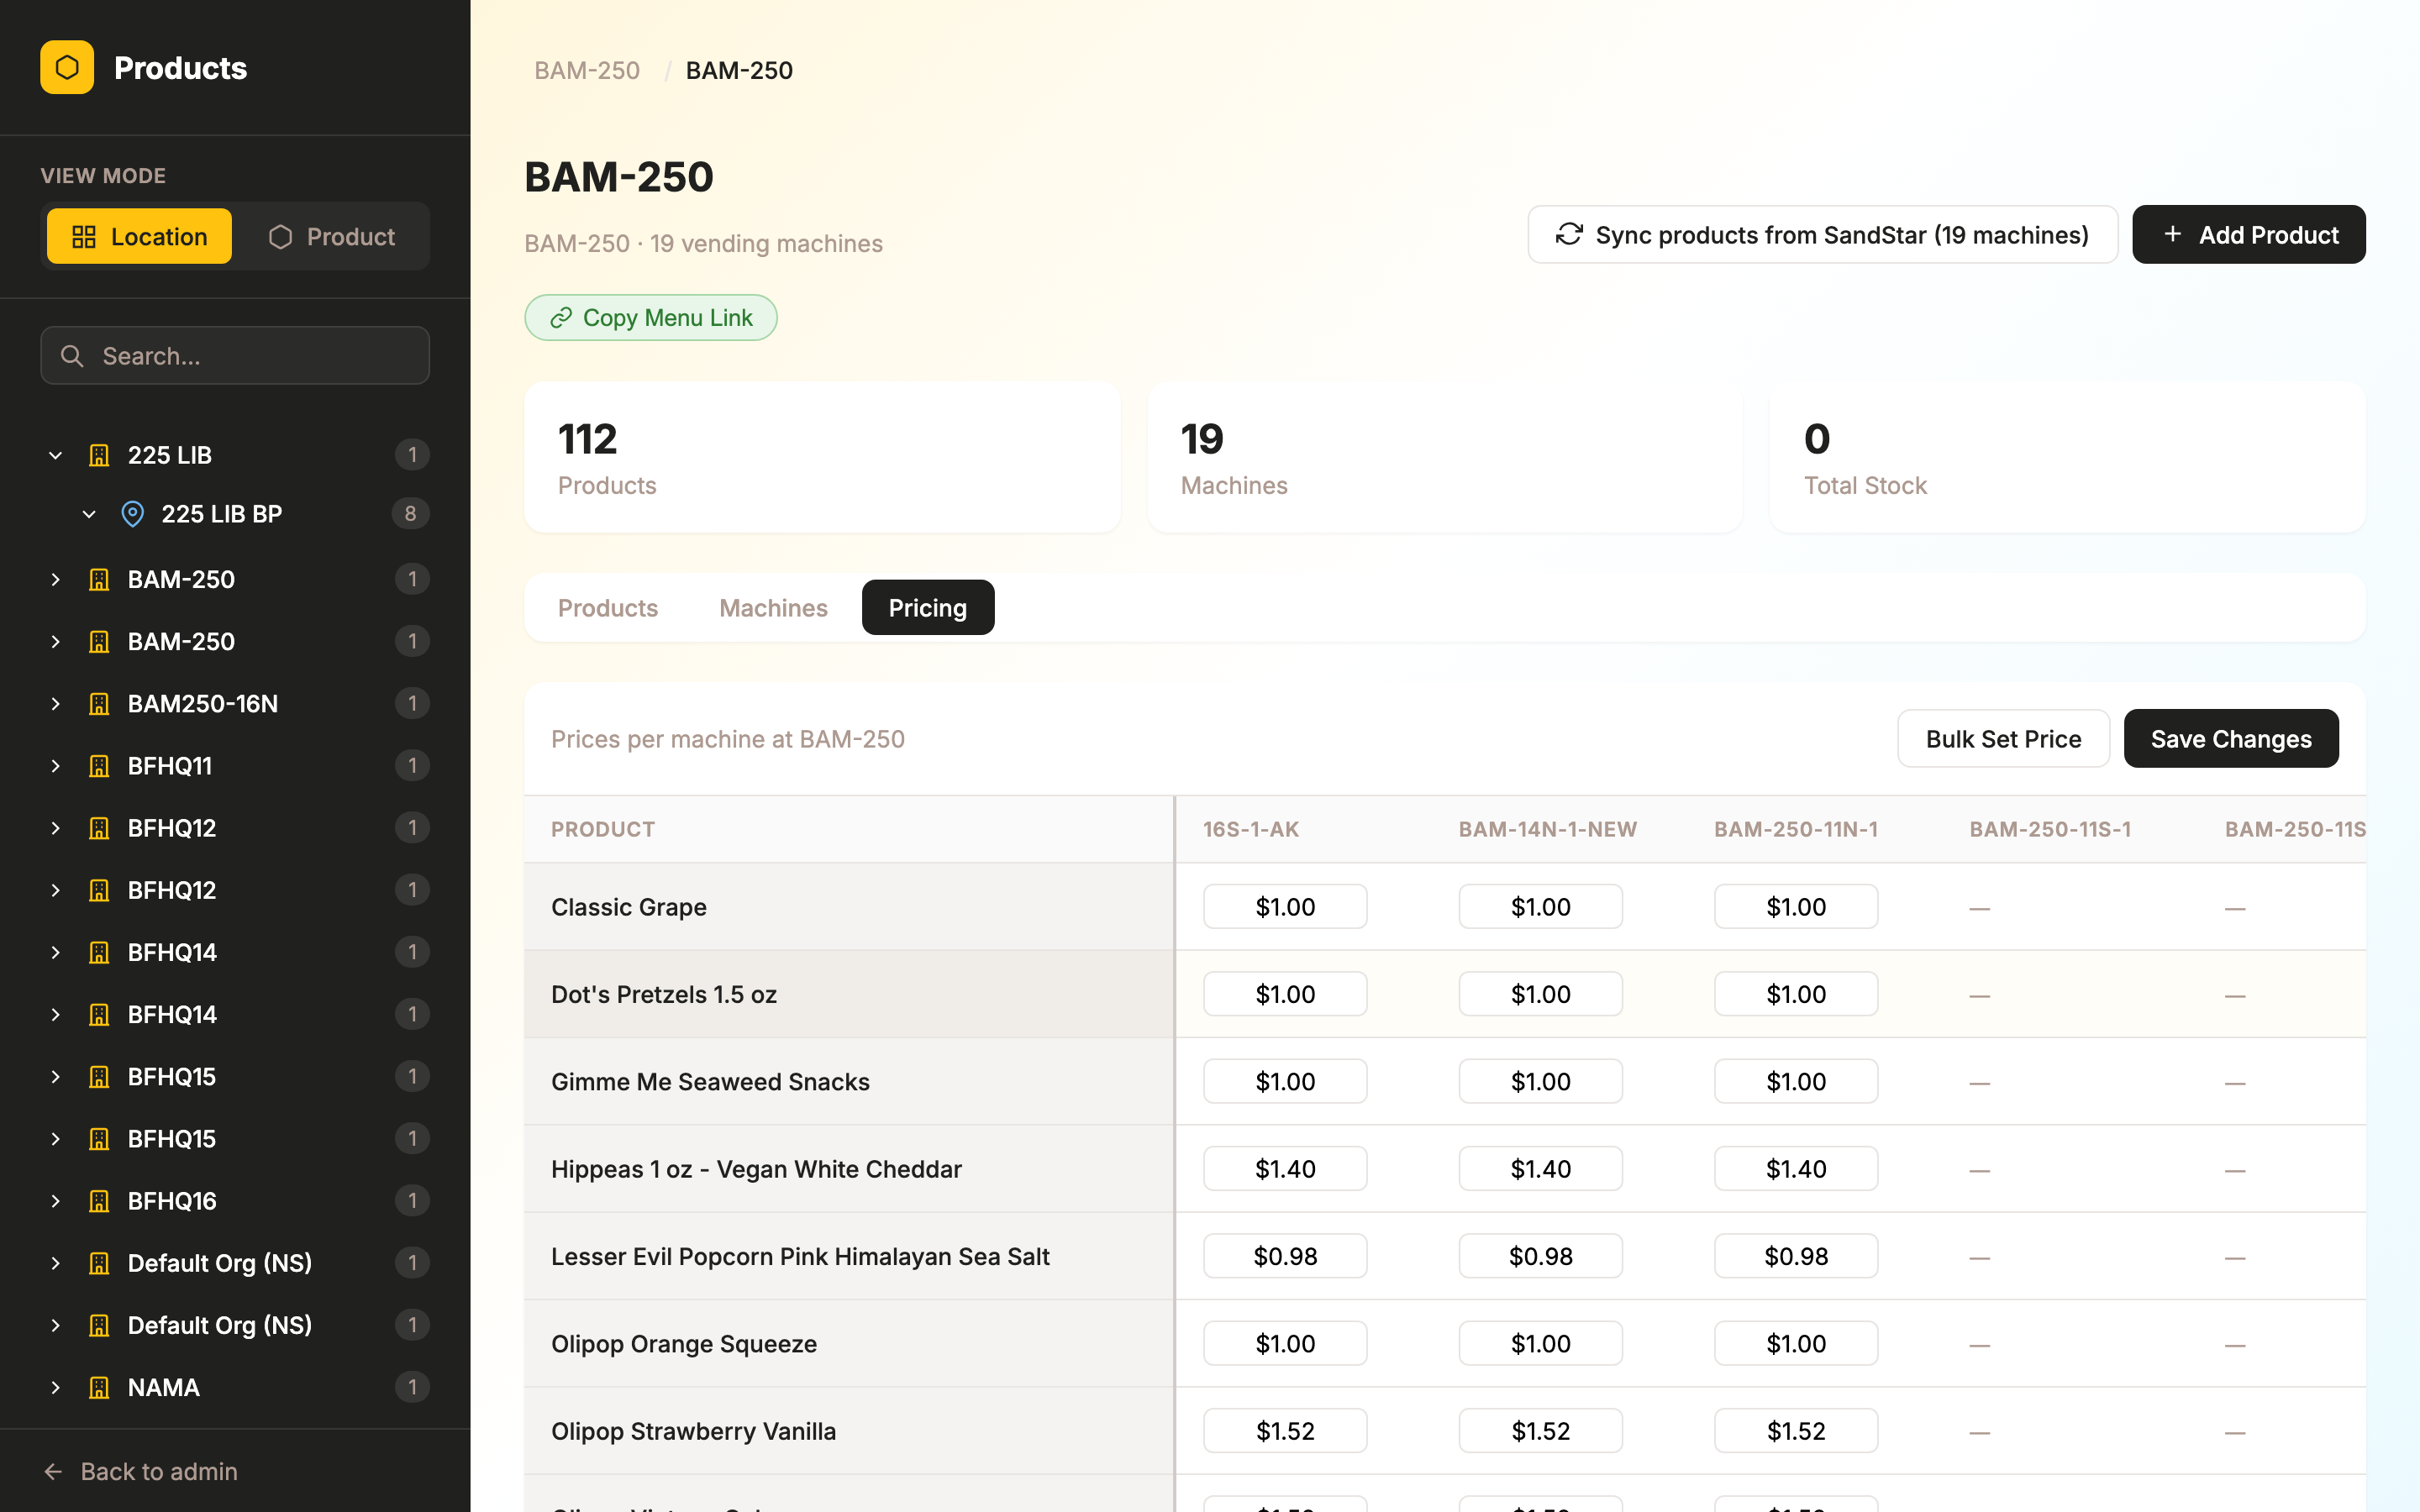
📷 Pricing tab — Cross-machine pricing table with inline editable prices, Bulk Set Price, and Save Changes
Create & Edit Products
| Action | How | Type |
|---|---|---|
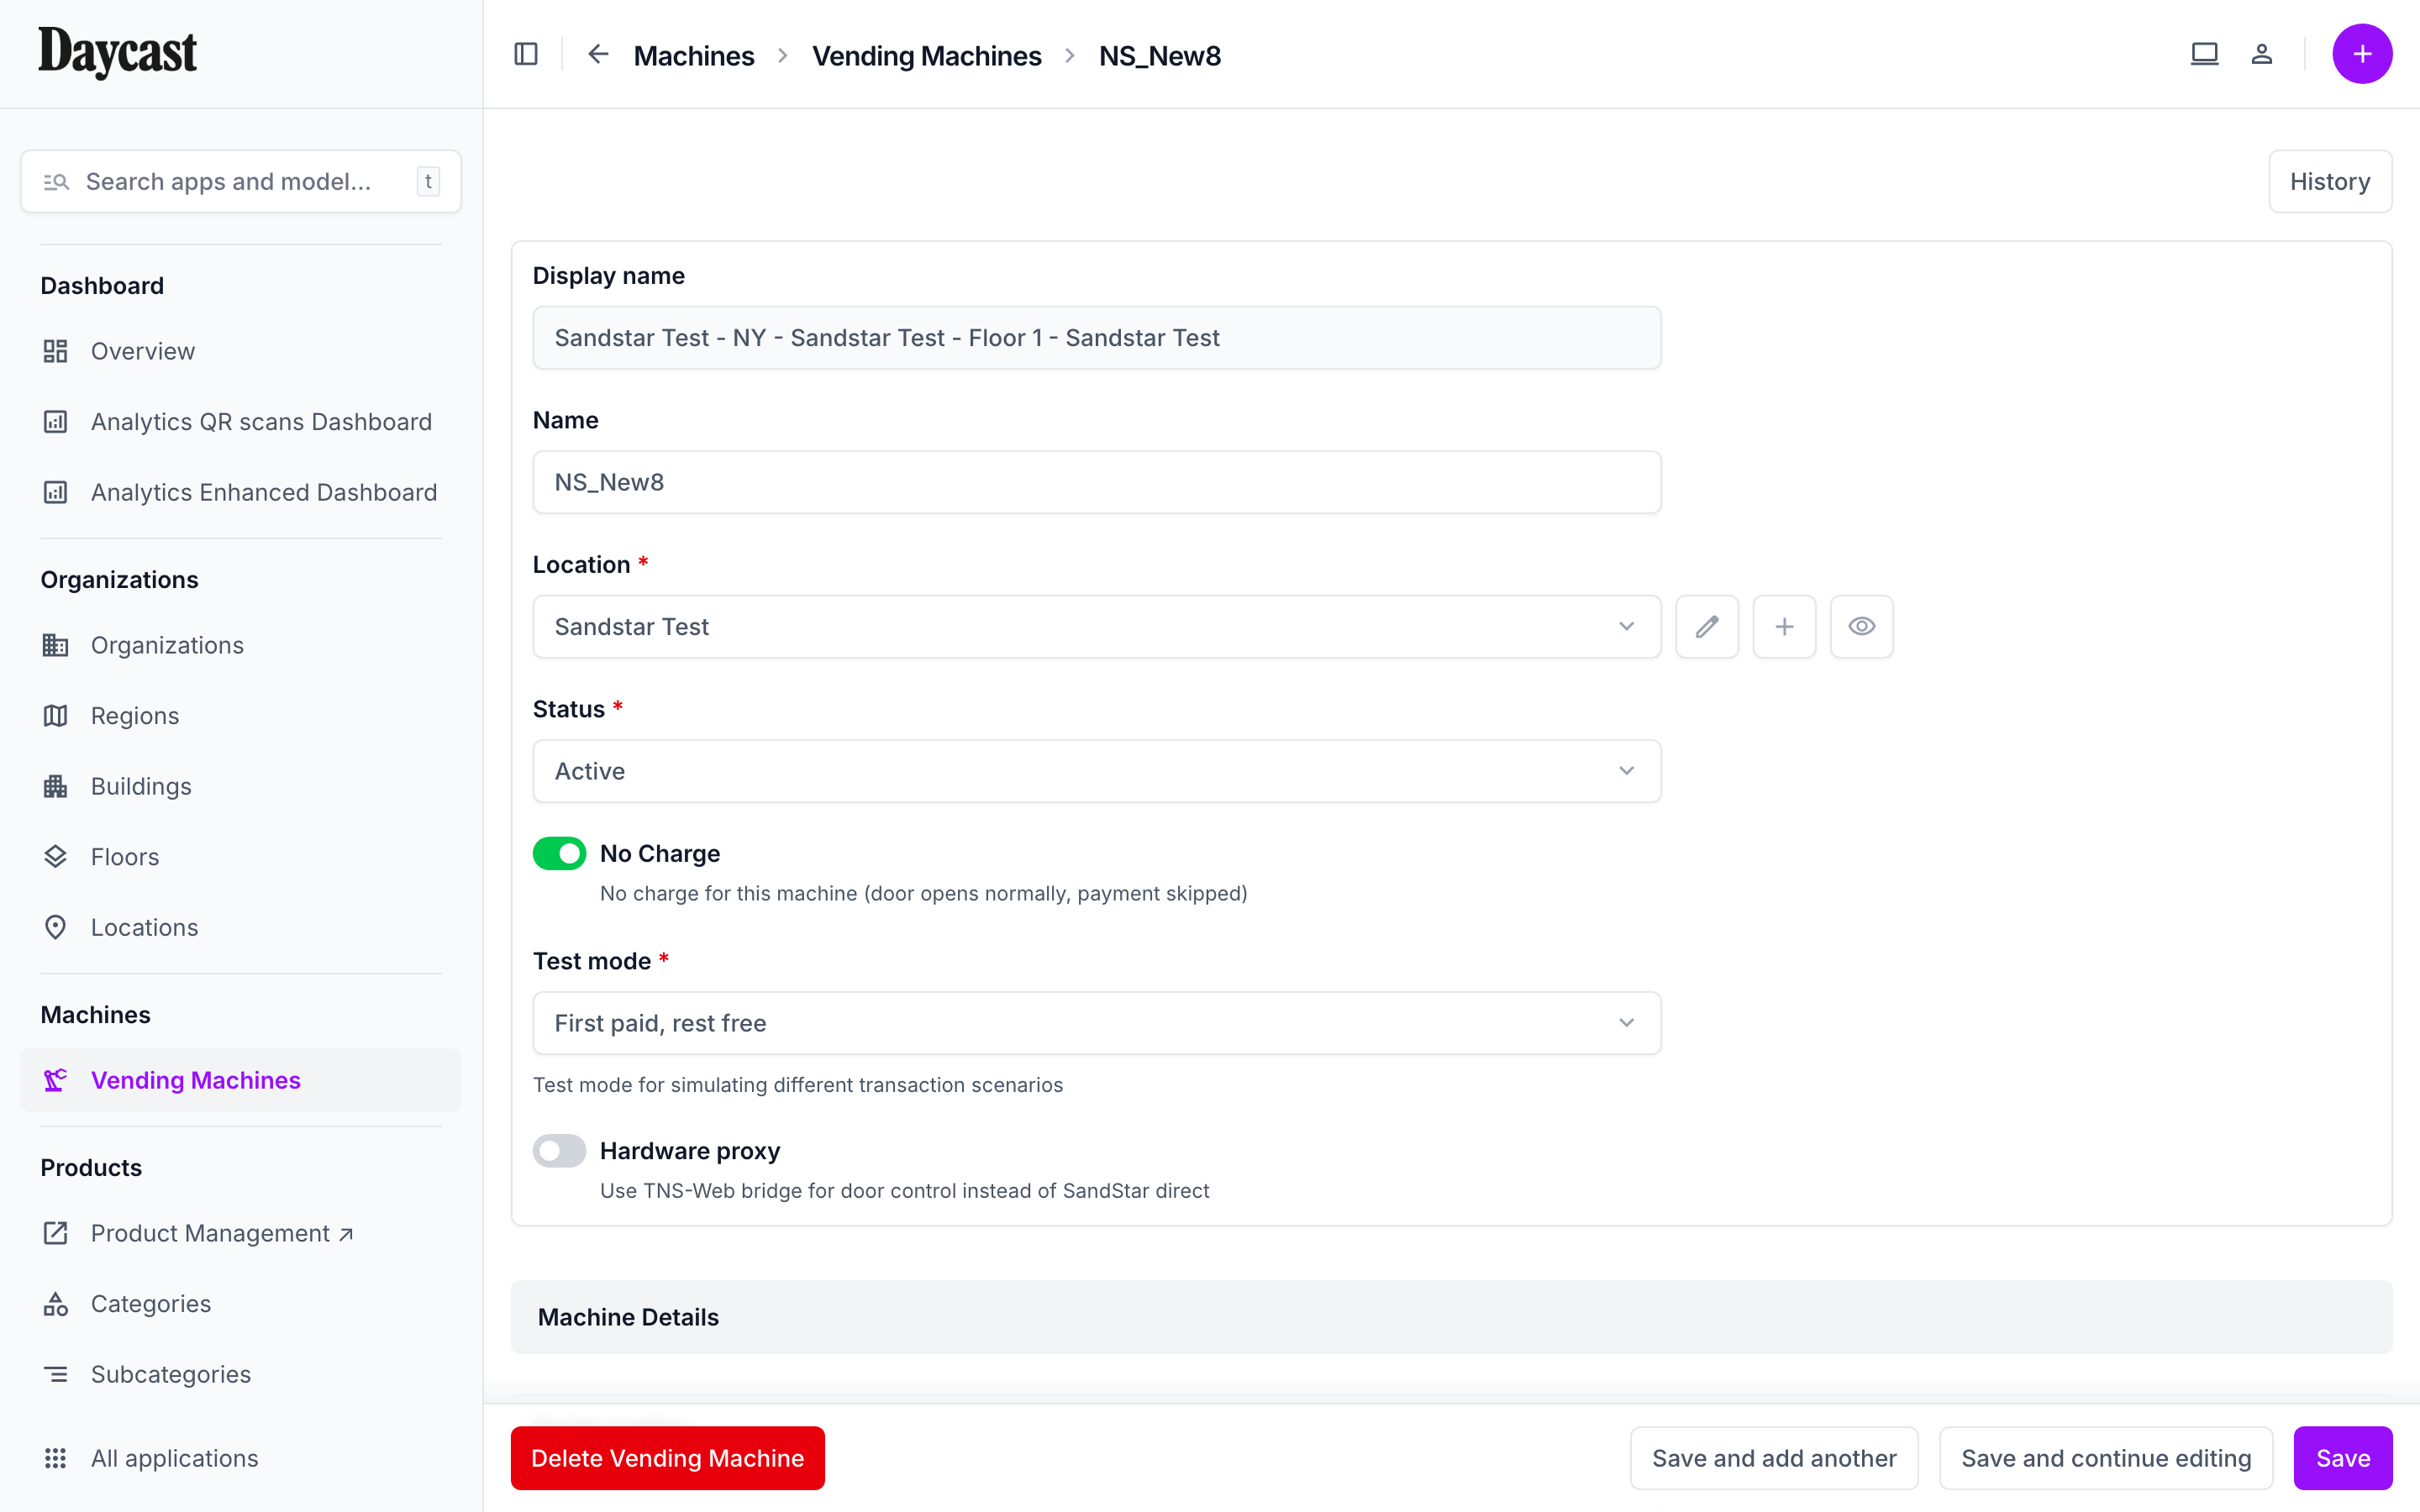
| Create a new product | Switch to Product View → click "+ New Product" → fill in name, SKU, category, price, image | Form |
| Edit product details | Click on a product → click "Edit" → modify fields → Save | Form |
| Upload product image | In the edit form, click the image area or "Choose File" | Upload |
| Delete a product | Click on a product → click the trash icon in the header | Click |
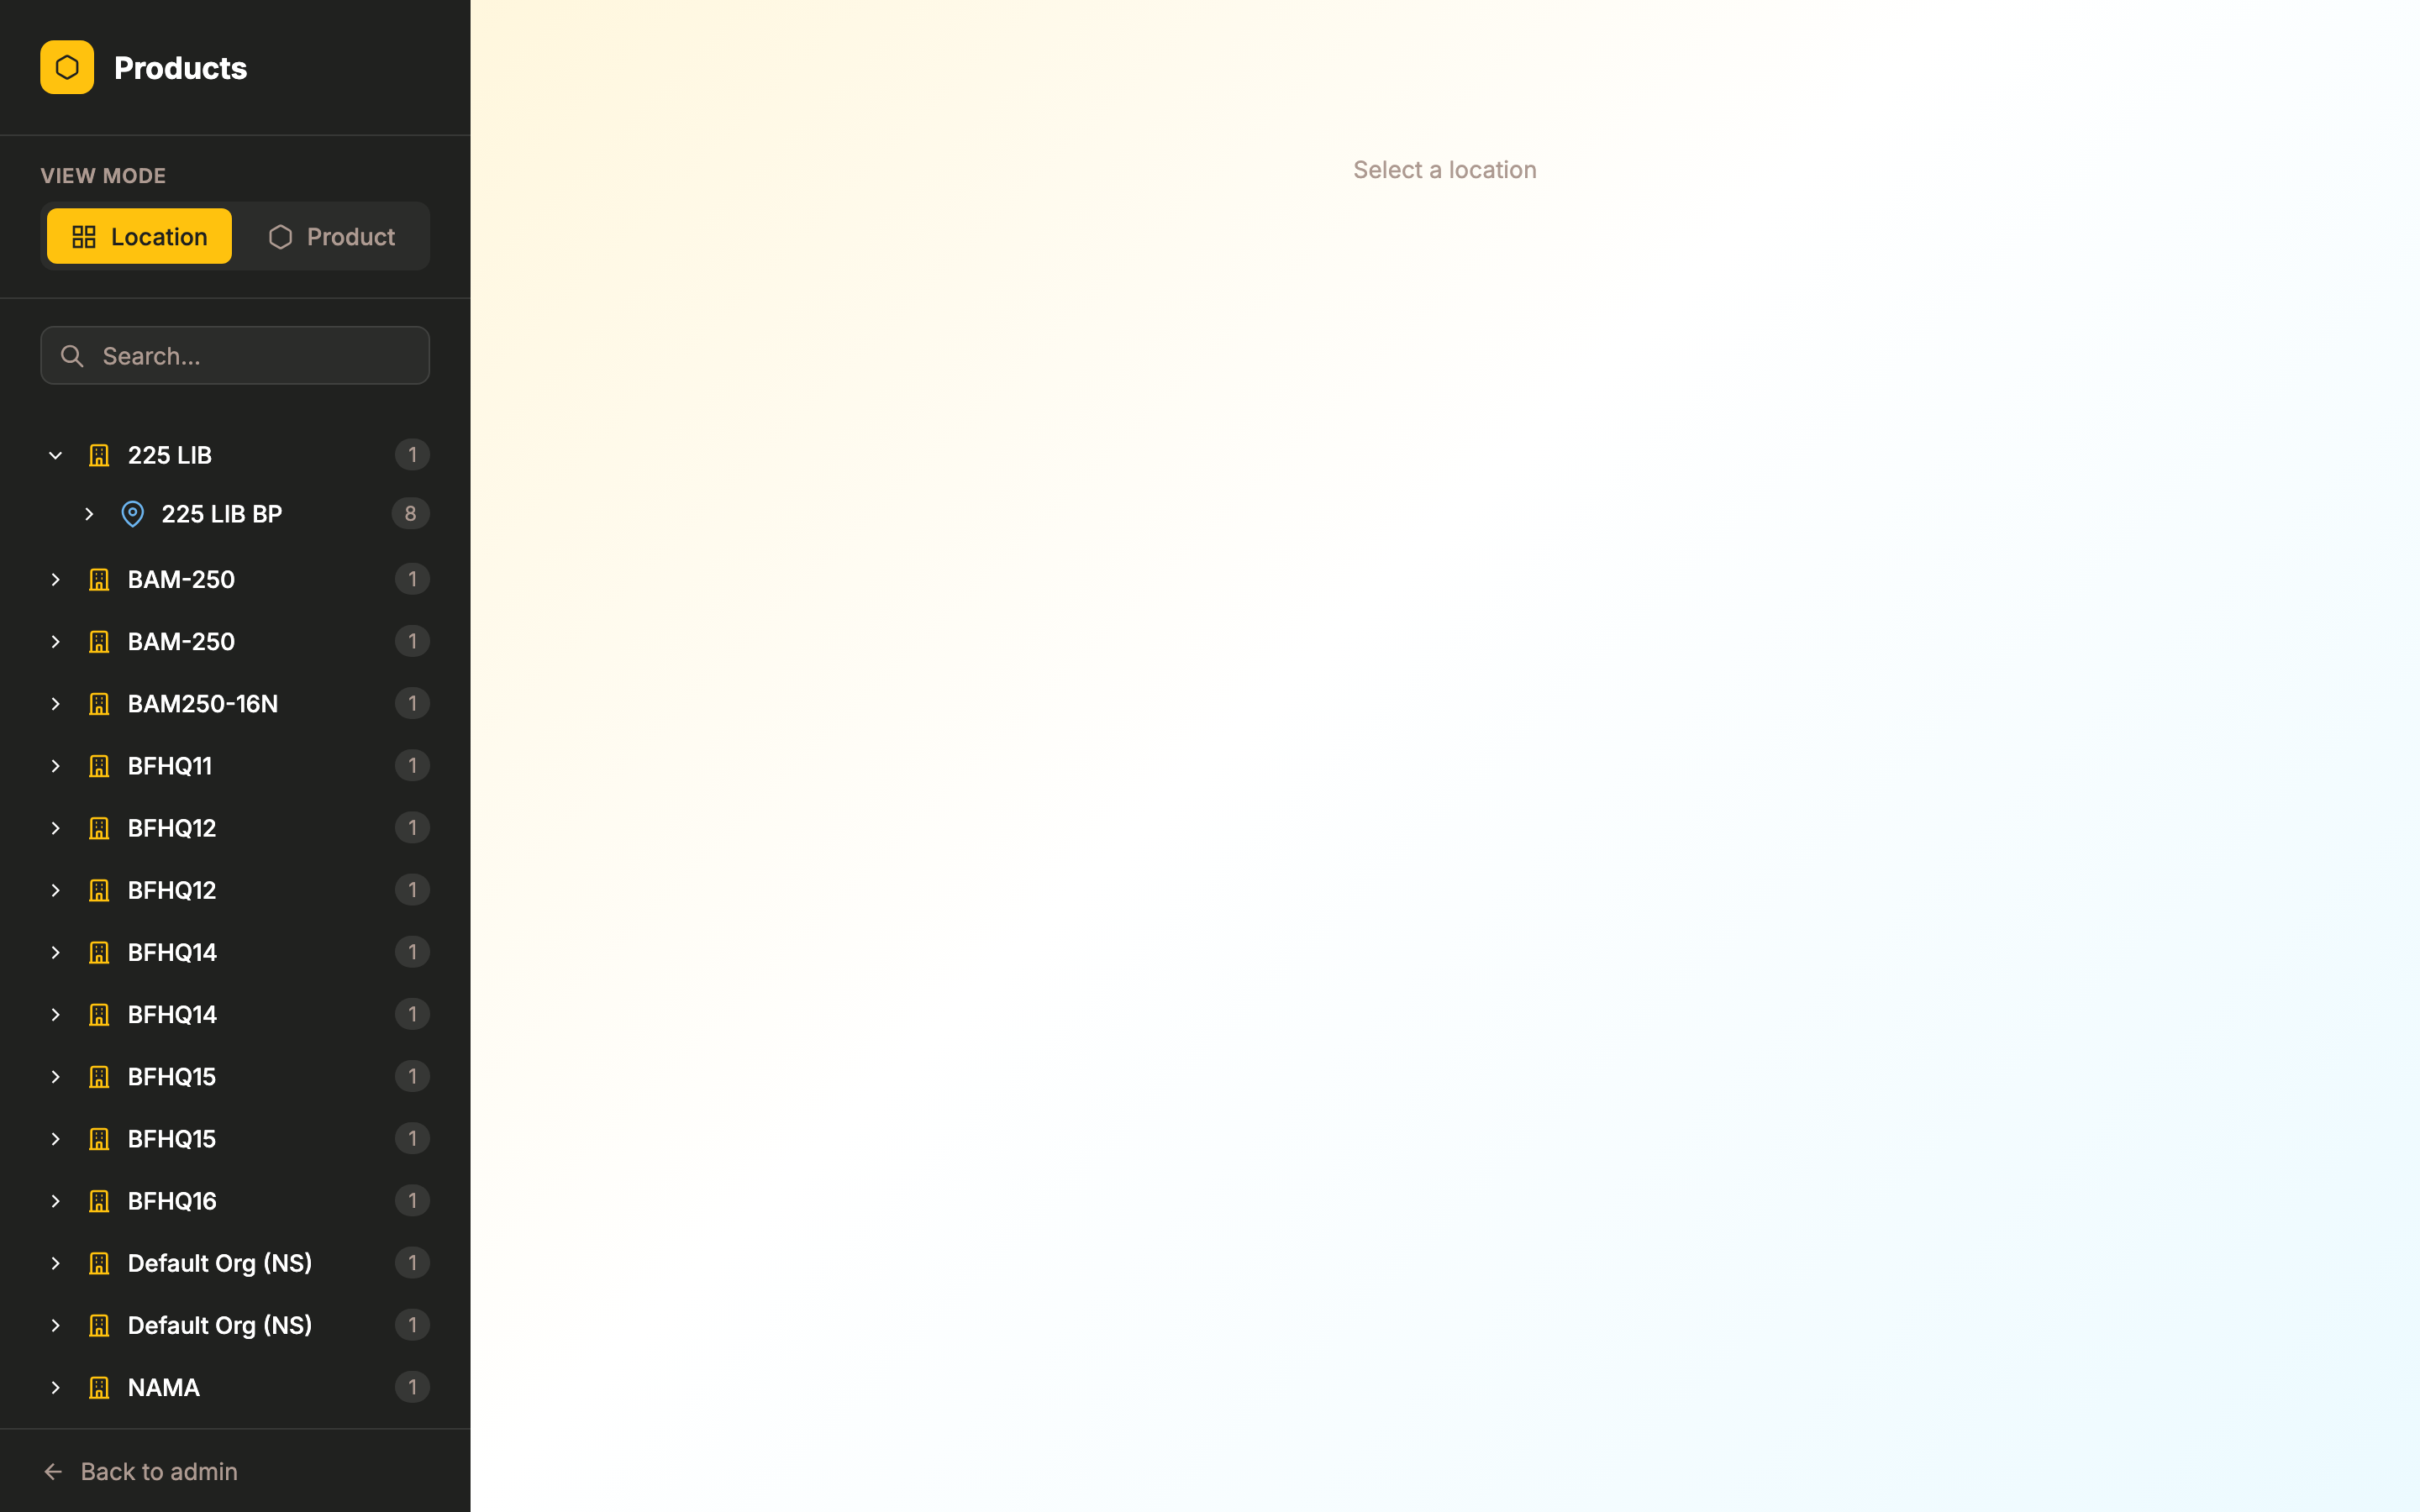
📷 Product View — Browse all products in the sidebar with images and prices
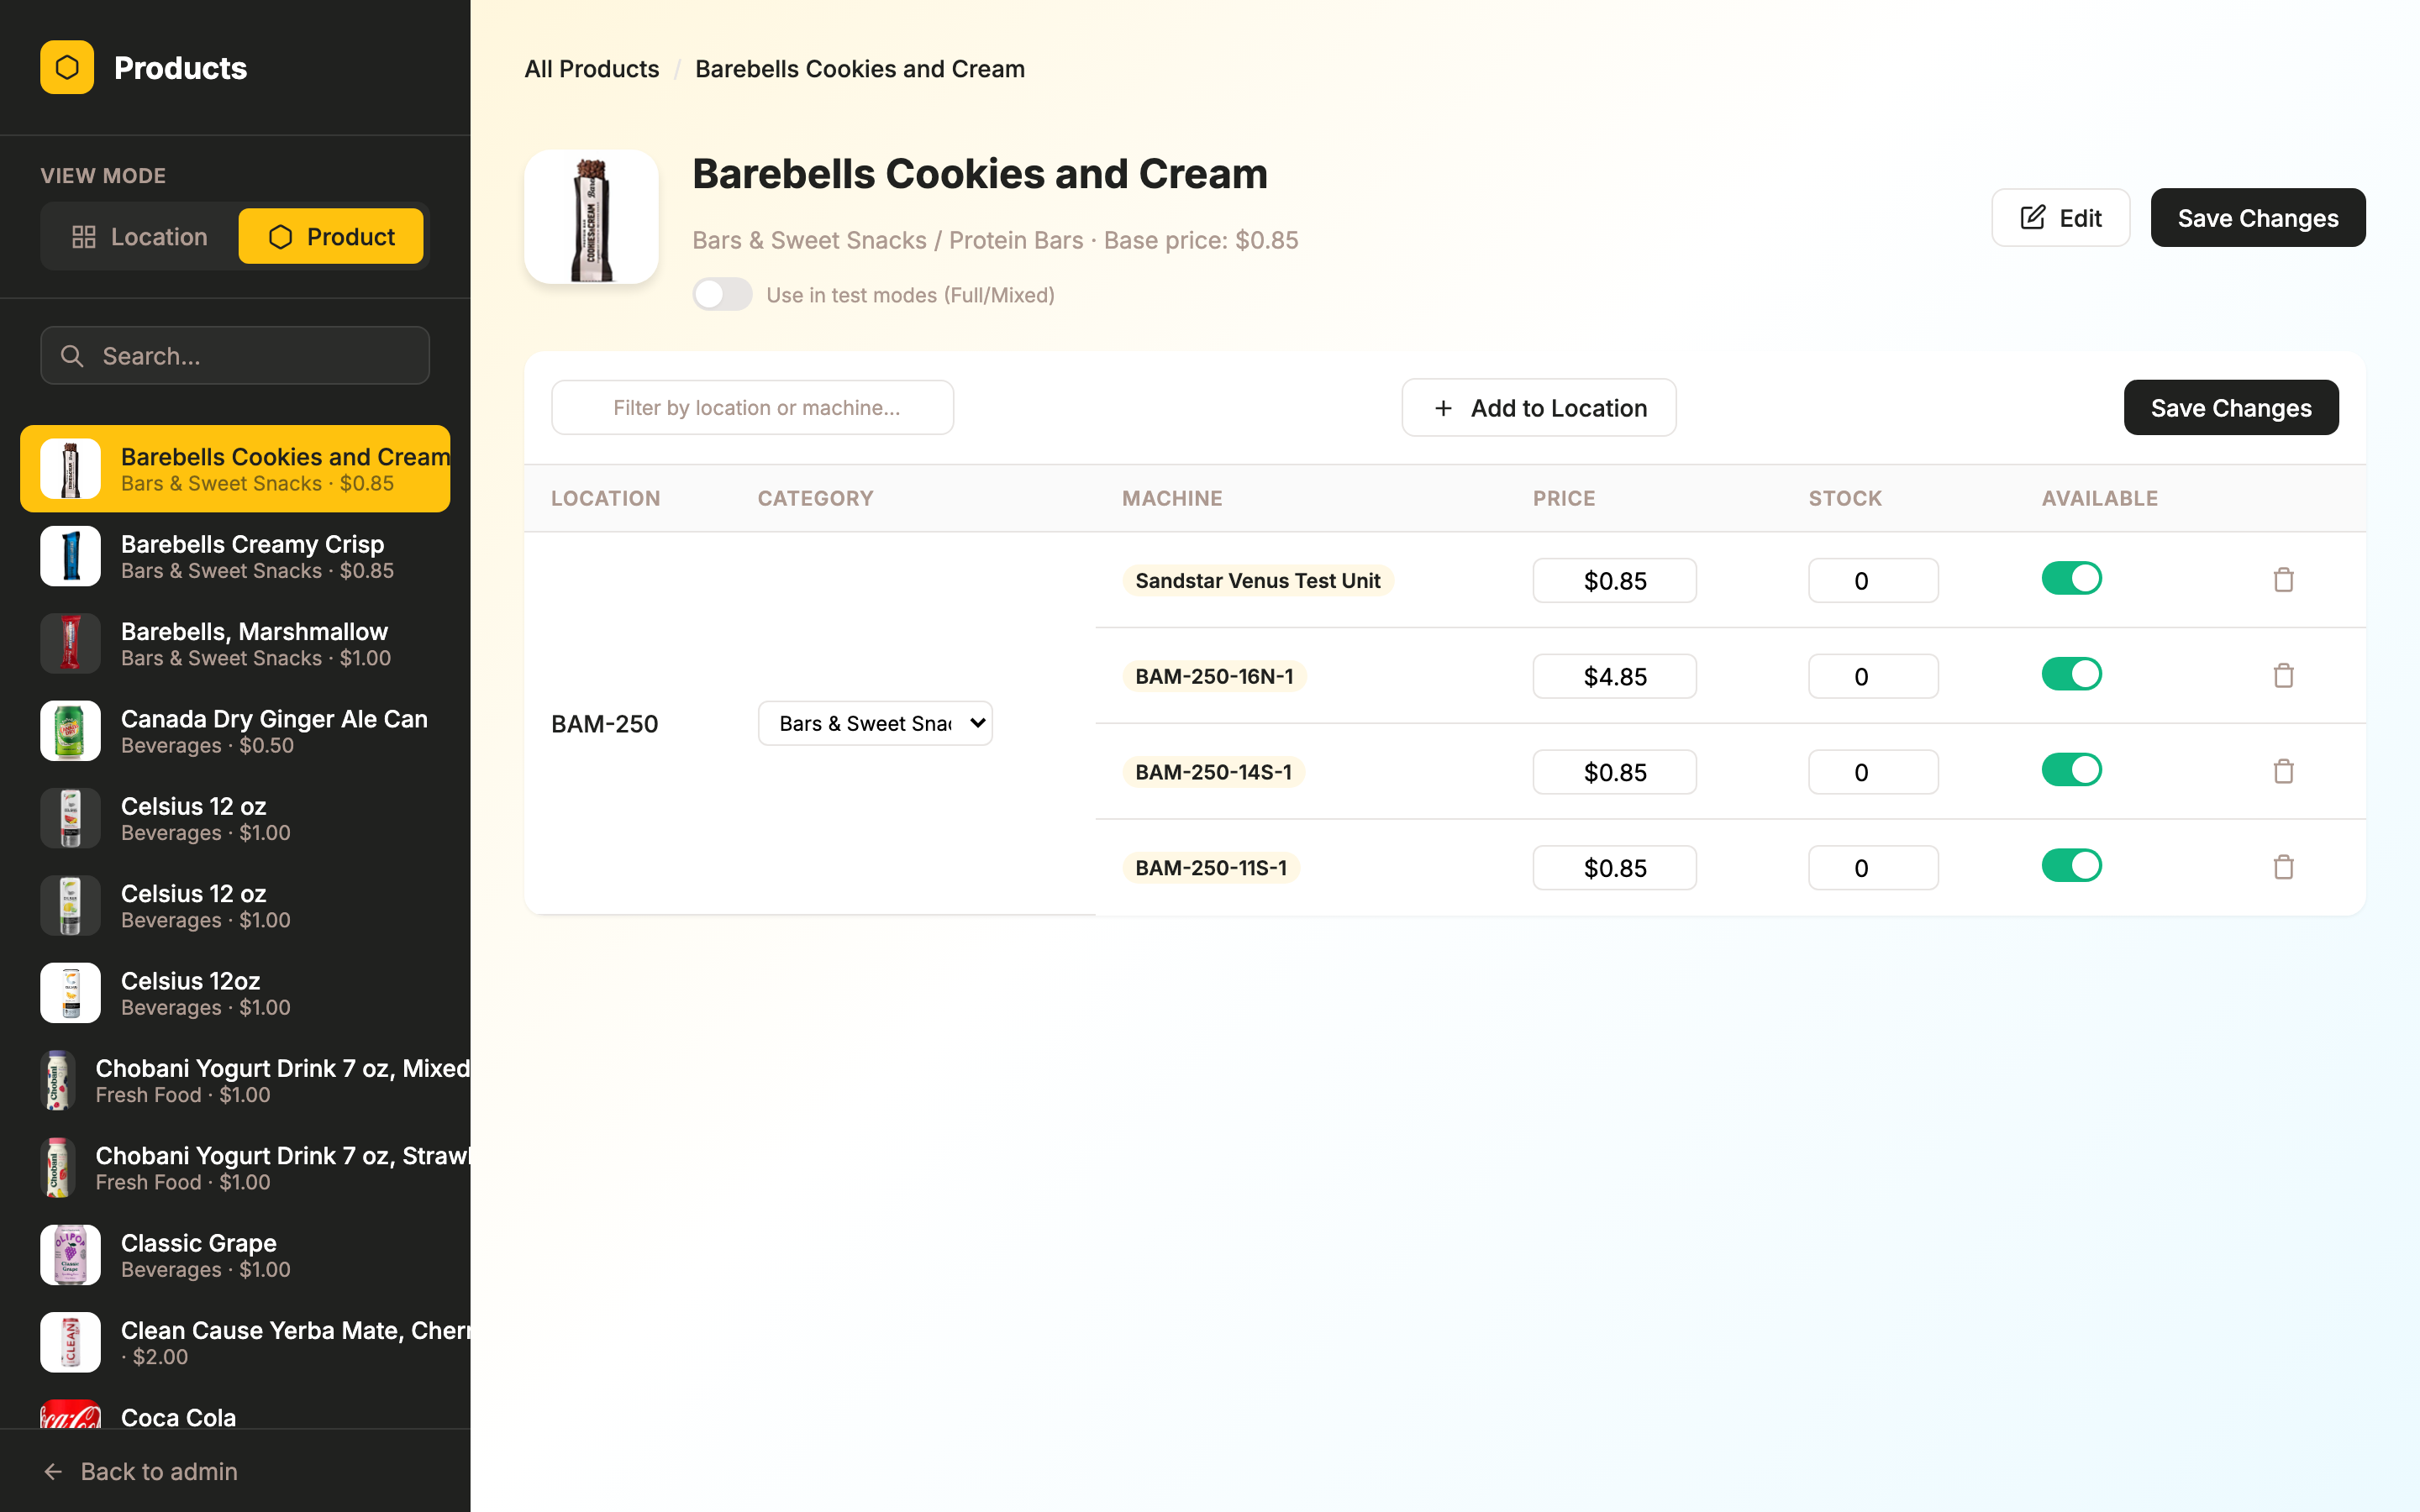
📷 Product detail — Locations, machines, pricing, stock & availability
Sync & Menu Management
| Action | How | Type |
|---|---|---|
| Sync products from SandStar | Click the "Sync" button next to a location or machine (requires external_id) | Sync |
| Create menu for a location | If no menu exists, a prompt appears → click "Create Menu" | Click |
| Copy menu QR link | Click the link icon next to the menu name in the header area | Click |
SandStar Sync only works for machines that have an
external_id configured and when the SandStar integration is active. The sync runs in the background — you'll see a confirmation toast when the task is queued.